Oil Free Almond Butter Almond butter is a delicious and nutritious spread that can be enjoyed on toast, in smoothies, or as a dip for fruits and vegetables. While traditional almond butter recipes often include added oils, it is possible to make a healthier version without any oil. In this recipe, we will guide you through the process of making oil-free almond butter at home. How do I enhance the taste of homemade oil-free almond butter? Homemade almond butter is a versatile and delicious ingredient that can be used in a variety of ways. Its creamy texture and nutty flavor make it a great addition to both sweet and savory dishes. Here are some ideas on how to use homemade almond butter: 1. Spread: One of the most common uses for almond butter is as a spread. You can use it as a healthier alternative to traditional spreads like peanut butter or Nutella. Spread it on toast, bagels, or crackers for a quick and nutritious snack. You can also add a drizzle of honey or sprinkle some cinnamon on top for extra flavor. 2. Smoothies: Almond butter can be a great addition to smoothies, adding creaminess and richness. Simply blend it with your favorite fruits, vegetables, and liquid base (such as almond milk or coconut water) for a nutritious and filling smoothie. It pairs well with ingredients like bananas, berries, spinach, and cocoa powder. 3. Baking: Almond butter can be used in various baked goods to add moisture and flavor. You can substitute it for other nut butters or even regular butter in recipes like cookies, brownies, muffins, and cakes. It works particularly well in recipes that call for nuts or have a nutty flavor profile. 4. Dips and Sauces: Homemade almond butter can be used as a base for dips and sauces. You can mix it with ingredients like yogurt, lemon juice, garlic, and herbs to create a creamy dip for vegetables or pita chips. It can also be thinned out with water or oil to make a flavorful sauce for noodles or stir-fries. 5. Salad Dressings: Almond butter can be incorporated into salad dressings to add richness and depth of flavor. Combine it with ingredients like olive oil, vinegar, mustard, honey, and herbs to create a creamy dressing that pairs well with salads containing fruits, vegetables, or grains. 6. Protein Bars and Energy Balls: Almond butter can be a key ingredient in homemade protein bars and energy balls. Its natural oils help bind the ingredients together, while its nutty flavor adds depth. Mix it with oats, dried fruits, nuts, seeds, and sweeteners like honey or maple syrup to create a nutritious and portable snack. 7. Stir-Fries: Almond butter can be used as a sauce or garnish for stir-fried dishes. Its creamy texture and nutty taste complement vegetables, tofu, chicken, or shrimp. You can mix it with soy sauce, ginger, garlic, and other seasonings to create a flavorful sauce that coats the ingredients. 8. Oatmeal: Add a spoonful of almond butter to your morning oatmeal for extra creaminess and flavor. It pairs well with toppings like sliced bananas, berries, nuts, seeds, or a drizzle of honey. 9. Ice Cream Topping: Drizzle homemade almond butter over your favorite ice cream flavors for a decadent treat. The combination of cold ice cream and warm almond butter creates a delightful contrast in textures and temperatures. 10. Homemade Granola: Incorporate almond butter into your homemade granola recipe for added richness and flavor. Mix it with oats, nuts, seeds, dried fruits, sweeteners like honey or maple syrup, and bake until golden brown for a crunchy and nutritious breakfast option. Products from the Recipe. You dont have to cook if you dont feel like it. Order Vegan Butter and have it shipped straight to your door step! Pin Print Oil Free Almond Butter Recipe by Custom Curves Course: SidesCuisine: VeganDifficulty: Easy Servings 8 servingsPrep time 20 minutesCooking time 10 minutesCalories 231 kcal Ingredients 2 cups raw almonds 1/4 teaspoon salt (optional) 1 tablespoon honey or maple syrup (optional) Directions Preheat your oven to 350°F (175°C). Spread the almonds evenly on a baking sheet and roast them for about 10 minutes until they become fragrant and slightly golden. This step helps to enhance the flavor of the almonds. Allow the roasted almonds to cool completely before proceeding to the next step. This will prevent them from turning into almond butter too quickly. Once cooled, transfer the almonds to a high-powered blender or food processor. You can also use a mortar and pestle if you prefer a chunkier texture. Blend or process the almonds on high speed for about 5 minutes, scraping down the sides occasionally. At first, the almonds will turn into a fine powder resembling almond flour. As you continue blending, the almonds will release their natural oils and start clumping together. Keep blending until you achieve a smooth and creamy consistency. This may take some time, so be patient. If desired, add salt and sweetener of your choice (honey or maple syrup) to enhance the flavor of your almond butter. Blend for an additional minute to incorporate these ingredients evenly. Once you have reached your desired consistency, transfer the oil-free almond butter to an airtight container and store it in the refrigerator for up to two weeks. Notes It’s important to use raw almonds for this recipe, as roasted almonds may already contain added oils. If you prefer a crunchy almond butter, you can reserve a small portion of the roasted almonds and chop them finely. Stir them into the creamy almond butter once it’s ready. Feel free to adjust the sweetness and saltiness according to your taste preferences. Oil-free almond butter is a type of almond butter that is made without the addition of any oils. Almond butter is typically made by grinding almonds into a smooth and creamy paste, similar to peanut butter. While some commercial brands of almond butter may contain added oils, such as vegetable oil or palm oil, oil-free almond butter is made solely from almonds. Oil-free almond
Strawberry Coconut Vegan Ice Cream
Strawberry Coconut Vegan Ice Cream Vegan strawberry ice cream made with a Ninja Creami is a delicious and guilt-free treat that is perfect for those following a plant-based diet or looking for a dairy-free alternative. The Ninja Creami is a versatile and powerful appliance that can create creamy and smooth ice cream without the need for dairy or refined sugars. To make vegan strawberry ice cream with a Ninja Creami, you will need a few simple ingredients. Start by gathering ripe strawberries, coconut milk, a natural sweetener of your choice (such as maple syrup or agave nectar), and a dash of vanilla extract for added flavor. Can I use any kind of non-dairy milk for this recipe? To make homemade vegan ice cream, you will need a few simple ingredients that are easily accessible. The base of this recipe typically consists of plant-based full fat milk. Using full fat coconut milk provide the necessary fat content to achieve the desired texture and consistency. Additionally, non-dairy milk, such a heavy cream or whipping cream could be a alternative solution. How do I enhance the taste of the vegan ice cream? Adding toppings like, sliced strawberries, non-dairy chocolate chips, coconut flakes, non-dairy chocolate syrup can be added to enhance the taste of a homemade vegan ice cream. One of the advantages of homemade vegan butter is that it allows customization according to personal preferences. By experimenting with toppings and flavorings, individuals can create their own unique variations of strawberry ice cream. Items from the Recipe! Order ingredients and have it shipped straight to your door step! Pin Print Strawberry Coconut Vegan Ice Cream Course: DessertCuisine: VeganDifficulty: Easy Servings 8 servingsPrep time 10 minutesCooking time 2 minutesCalories 190 kcal Ingredients 2 cans of full-fat coconut milk 2 cups of fresh or frozen strawberries 1/2 cup of agave nectar or sweetener of choice 1 teaspoon of lemon juice Directions Chill the cans of coconut milk in the refrigerator. Blend together the strawberries, coconut cream, agave nectar, and lemon juice until the mixture is smooth and pink. Transfer the blended mixture to your Ninja Creami and churn according to the manufacturer’s instructions. Once churned, pour the ice cream into a container and freeze until it solidifies. Delight in the refreshing taste of strawberry coconut goodness. The result is a luscious and refreshing vegan strawberry ice cream that is bursting with fruity flavors. The Ninja Creami’s unique technology ensures that you achieve a creamy and smooth texture without the need for traditional dairy products. Plus, the natural sweetness of the strawberries combined with the creaminess of the coconut milk provides a delectable and satisfying dessert option. Feel free to get creative with your vegan strawberry ice cream by adding toppings like fresh sliced strawberries, crushed nuts, or a drizzle of melted dairy-free chocolate. You can also experiment with other flavors and variations by substituting the strawberries with different fruits or adding in mix-ins like chocolate chips or shredded coconut. Overall, making vegan strawberry ice cream with a Ninja Creami is a simple and enjoyable process that allows you to indulge in a creamy and flavorful dessert while adhering to a plant-based lifestyle. Share: Facebook Pinterest Email Social Media Facebook-f Youtube Pinterest Instagram Tiktok Most Popular Get The Latest Updates Subscribe To Our Weekly Newsletter No spam, notifications only about new post, updates. Categories On Key Related Posts
Chicken Buddha Bowl
chicken Buddha Bowl Chicken Buddha bowls are a vibrant and nutritious meal option, perfect for a balanced diet. These bowls typically feature a base of grains like quinoa or brown rice, topped with succulent grilled or roasted chicken. They are packed with an array of fresh and colorful vegetables, such as spinach, carrots, cucumbers, and avocado, offering a variety of textures and flavors. Often finished with a drizzle of tangy dressing or a dollop of hummus, Chicken Buddha bowls provide a satisfying combination of protein, fiber, and healthy fats. Ideal for meal prep or a quick weeknight dinner, they are a delicious way to enjoy a wholesome and balanced meal. Can I use any type of toppings? Of course, the more the merrier! We do recommend if you wish to keep the calorie count down, reframe from additional toppings. Can I make this recipe without chicken? Yes! You can substitute with shrimp, salmon, beef, lamb, or whatever. Or you do not have to substitute at all–just omit the first part of the ingredients and the instructions of this recipe. Psst! Try these dressings! Best thing about budhha bowls is a there are no rules–you dress it how ever you want! Shop Now Shop Now Shop Now Shop Now Pin Print Chicken Buddha Bowl Recipe by Custom Curves Course: Dinner, LunchDifficulty: Medium Servings 4 servingsPrep time 30 minutesCooking time 40 minutesCalories 300 kcal A Nutritious and Flavorful Recipe: Vegetable Buddha Bowl Lunch with Chicken, Quinoa, Chickpeas, Mushrooms, Lettuce, and Tomatoes Ingredients For Chicken 2 whole boneless, skinless chicken breasts 1 Tbsp olive oil 1 tsp paprika 1/2 tsp garlic powder Salt and pepper to taste For the Quinoa 1 cup quinoa 2 cups water or vegetable broth Salt to taste For the chickpeas 1 can (15 ounces) chickpeas (garbanzo beans), drained and rinsed 1 Tbsp olive oil 1/2 tsp ground cumin 1/2 tsp smoked paprika Salt to taste For Mushrooms 8 ounces mushrooms (such as cremini or button), sliced 1 Tbsp olive oil 2 cloves garlic, minced Salt and pepper to taste For Bowl Assembly 4 cups cups mixed lettuce leaves 1 cup cherry tomatoes (halved) Lemon wedges for serving 1 whole avocado, sliced (optional) Directions Preparing the Chicken Preheat your oven to 400°F (200°C). Rub the chicken breasts with olive oil, paprika, garlic powder, salt, and pepper Place the seasoned chicken on a baking sheet and bake for 20-25 minutes or until cooked through. Once done, set aside to cool before slicing. For Cooking the Quinoa Rinse the quinoa under cold water to remove any bitterness. In a medium-sized saucepan, combine the rinsed quinoa, water or vegetable broth, and salt. Bring the mixture to a boil over medium heat, then reduce the heat to low and cover. Simmer for 15-20 minutes or until the liquid is absorbed and the quinoa is tender. Fluff with a fork and set aside. Roasting the chickpeas Preheat your oven to 400°F (200°C). In a bowl, toss the drained and rinsed chickpeas with olive oil, cumin, smoked paprika, and salt Spread the seasoned chickpeas on a baking sheet and roast for 20-25 minutes or until crispy. Stir occasionally for even browning Sautéing the mushrooms: Heat olive oil in a skillet over medium heat. Add minced garlic and sliced mushrooms to the skillet. Sauté for 5-7 minutes or until the mushrooms are tender and golden brown Season with salt and pepper to taste. Assembling the Buddha bowl Divide the mixed lettuce leaves between two bowls as a base Arrange sliced chicken, cooked quinoa, roasted chickpeas, sautéed mushrooms, cherry tomatoes, and any additional vegetables you desire on top of the lettuce. Add any additional topping such as sliced avocado, cabbage or raw broccoli Drizzle your favorite dressing over the bowl or serve it on the side. Squeeze fresh lemon juice over the bowl for an extra burst of flavor. Toss the ingredients together just before eating to combine all the flavors. In conclusion, Chicken Buddha bowls are a versatile and nutritious meal option that combines the best of both taste and health. With a harmonious blend of tender chicken, fresh vegetables, and wholesome grains, these bowls offer a balanced array of nutrients essential for a healthy diet. Their customizable nature allows for endless creativity, making them suitable for various dietary preferences and lifestyles. Whether enjoyed as a quick lunch or a hearty dinner, Chicken Buddha bowls provide a satisfying, delicious, and nutrient-packed dining experience that can easily become a staple in anyone’s meal repertoire. Share: Facebook Pinterest Email Shop Now Social Media Facebook-f Youtube Pinterest Instagram Tiktok Most Popular Get The Latest Updates Subscribe To Our Weekly Newsletter No spam, notifications only about new post, updates. Categories On Key Related Posts
Macadamia Cilantro Crust Baked Salmon
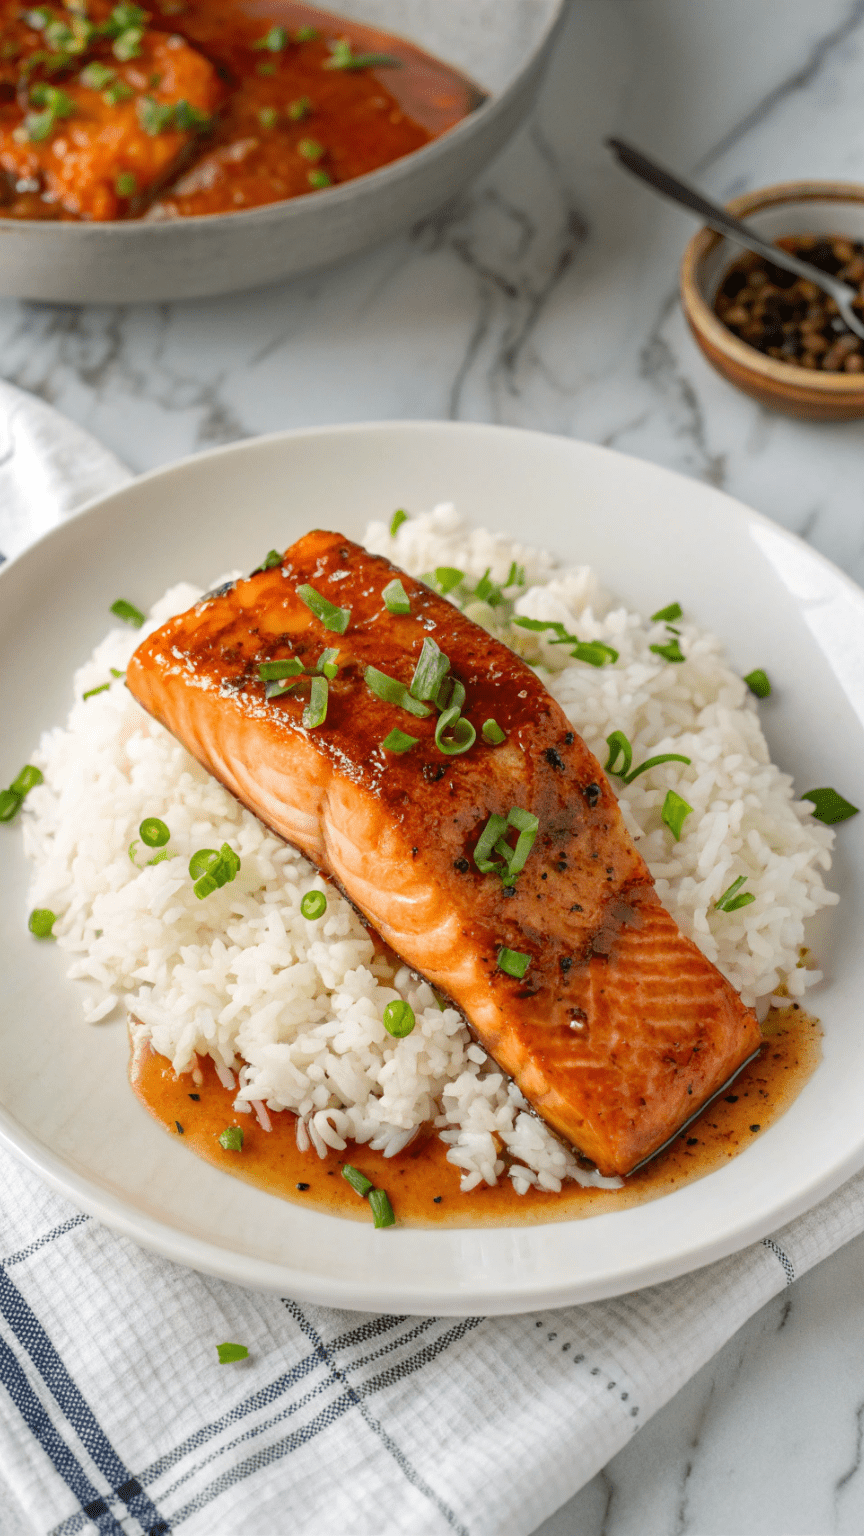
Introduction:Salmon is a versatile and nutritious fish that is loved by seafood enthusiasts worldwide. When combined with a crunchy macadamia-cilantro crust, it takes on a whole new level of flavor and texture. In this blog post, we will guide you through the step-by-step process of preparing a mouthwatering baked salmon dish with a delightful macadamia-cilantro crust. Get ready to impress your family and friends with this delectable recipe! Ingredients:To make this delicious baked salmon with macadamia-cilantro crust, you will need the following ingredients: – 4 salmon fillets (6 ounces each)– 1 cup macadamia nuts, finely chopped– 1/2 cup fresh cilantro leaves, finely chopped– 1/4 cup panko breadcrumbs– 2 tablespoons Dijon mustard– 2 tablespoons honey– 1 tablespoon olive oil– Salt and pepper to taste Instructions: 1. Preheat the oven: Start by preheating your oven to 400°F (200°C). This will ensure that your salmon cooks evenly and develops a beautiful crust. 2. Prepare the macadamia-cilantro crust: In a mixing bowl, combine the finely chopped macadamia nuts, cilantro leaves, panko breadcrumbs, salt, and pepper. Mix well until all the ingredients are evenly distributed. 3. Season the salmon fillets: Place the salmon fillets on a baking sheet lined with parchment paper or aluminum foil. Season both sides of the fillets with salt and pepper according to your taste preferences. 4. Apply Dijon mustard and honey: In a small bowl, whisk together the Dijon mustard and honey until well combined. Brush this mixture evenly over the top of each salmon fillet. 5. Add the macadamia-cilantro crust: Take the macadamia-cilantro crust mixture and press it onto the top of each salmon fillet, ensuring an even coating. Gently pat down the crust to help it adhere to the salmon. 6. Drizzle with olive oil: Drizzle a tablespoon of olive oil over the top of each salmon fillet. This will help the crust turn golden brown and add a touch of richness to the dish. 7. Bake the salmon: Place the baking sheet with the salmon fillets in the preheated oven and bake for approximately 12-15 minutes, or until the salmon is cooked through and the crust is golden brown. 8. Serve and enjoy: Once baked, remove the salmon from the oven and let it rest for a few minutes. Serve your delicious baked salmon with macadamia-cilantro crust alongside your favorite side dishes, such as roasted vegetables or a fresh salad. Conclusion:Baked salmon with macadamia-cilantro crust is a delightful dish that combines the natural flavors of salmon with a crunchy and aromatic topping. The combination of macadamia nuts, cilantro, Dijon mustard, and honey creates a harmonious blend of textures and tastes that will leave you craving more. Whether you’re hosting a dinner party or simply looking to elevate your weeknight meal, this recipe is sure to impress. Give it a try and savor every bite!
Vegan Chocolate Protein Shake
Are you looking for a delicious and healthy way to boost your protein intake? Look no further than a vegan chocolate protein shake! Packed with plant-based protein, essential nutrients, and the rich flavor of chocolate, this shake is not only satisfying but also nourishing. In this blog post, we will guide you through a simple and scrumptious recipe that will leave you energized and ready to take on the day. Ingredients: To create a vegan chocolate protein shake, you will need the following ingredients: – 1 ripe banana – 1 cup of unsweetened almond milk (or any plant-based milk of your choice) – 2 tablespoons of cocoa powder – 1 tablespoon of almond butter (or any nut butter) – 1 scoop of vegan chocolate protein powder – 1 teaspoon of maple syrup or agave nectar (optional, for added sweetness) – A handful of ice cubes Instructions: Now that we have gathered our ingredients, let’s dive into the step-by-step process of making this delectable vegan chocolate protein shake: Step 1: Gather all the ingredients and ensure they are readily available. Step 2: Peel the ripe banana and break it into smaller chunks for easier blending. Step 3: In a blender, combine the banana chunks, unsweetened almond milk, cocoa powder, almond butter, vegan chocolate protein powder, and sweetener (if desired). Step 4: Add a handful of ice cubes to the blender. The ice will help create a refreshing and creamy texture. Step 5: Blend all the ingredients together until smooth and creamy. If needed, scrape down the sides of the blender and blend again to ensure everything is well incorporated. Step 6: Once blended to your desired consistency, pour the vegan chocolate protein shake into a glass. Step 7: Optionally, you can garnish your shake with a sprinkle of cocoa powder or a few chocolate shavings for an extra touch of indulgence. Step 8: Serve immediately and enjoy the delightful flavors of your homemade vegan chocolate protein shake! Benefits of a Vegan Chocolate Protein Shake: This vegan chocolate protein shake offers numerous benefits, making it an excellent choice for those seeking a nutritious and satisfying beverage: 1. Plant-Based Protein: Vegan protein powders derived from sources like peas, brown rice, or hemp provide all the essential amino acids required by the body. They are easily digestible and suitable for individuals following a vegan or vegetarian lifestyle. 2. Nutrient-Rich: This shake is not only high in protein but also contains essential vitamins and minerals found in ingredients like bananas, almond milk, and cocoa powder. These nutrients contribute to overall health and well-being. 3. Satisfying and Energizing: The combination of protein, healthy fats from almond butter, and natural sugars from the banana provides a balanced source of energy that can keep you feeling full and satisfied throughout the day. Conclusion: Incorporating a vegan chocolate protein shake into your daily routine is an excellent way to boost your protein intake while enjoying a delicious treat. This recipe is simple to make, customizable to suit your taste preferences, and packed with essential nutrients. So why not indulge in this guilt-free pleasure and give your body the nourishment it deserves?
Homemade Vegan Butter Recipe
Homemade Vegan Butter Recipe As the popularity of veganism continues to rise, so does the demand for plant-based alternatives to traditional dairy products. One such staple in many kitchens is butter, which adds richness and flavor to a wide range of dishes. Fortunately, creating a vegan version of this beloved ingredient is easier than you might think. In this blog post, we will guide you through a simple yet delicious recipe for vegan butter that can be made at home. Homemade vegan butter is a versatile and delicious alternative to traditional dairy butter. It is a plant-based spread that mimics the creamy texture and rich flavor of butter, making it an excellent choice for those following a vegan or dairy-free diet. This homemade version allows you to have full control over the ingredients, ensuring a healthier and more sustainable option. Can I use any kind of non-dairy milk for this recipe? To make homemade vegan butter, you will need a few simple ingredients that are easily accessible. The base of this recipe typically consists of plant-based oils such as coconut oil, olive oil, or avocado oil. These oils provide the necessary fat content to achieve the desired texture and consistency. Additionally, non-dairy milk, such as almond milk or soy milk, is often used to add creaminess. How do I enhance the taste of homemade vegan butter? One common ingredient in homemade vegan butter is nutritional yeast. Nutritional yeast not only adds a subtle cheesy flavor but also provides essential nutrients like B vitamins. Other flavorings such as salt, apple cider vinegar, and lemon juice can be added to enhance the taste and mimic the tanginess of traditional butter. One of the advantages of homemade vegan butter is that it allows customization according to personal preferences. By experimenting with different oils and flavorings, individuals can create their own unique variations of vegan butter tailored to their taste buds. What can I use homemade vegan butter on? Homemade vegan butter can be used in various ways in cooking and baking. It can be spread on toast, used for sautéing vegetables, or incorporated into recipes that call for butter. It can also be used as a substitute for dairy butter in baking, providing moisture and richness to cakes, cookies, and pastries. In addition to being a suitable option for vegans and those with dairy allergies, homemade vegan butter also offers environmental benefits. The production of traditional dairy butter requires significant amounts of water, land, and resources. By opting for homemade vegan butter, individuals can contribute to reducing their carbon footprint and promoting sustainability. Feeling Lazy? You dont have to cook if you dont feel like it. Order Vegan Butter and have it shipped straight to your door step! Pin Print Vegan Butter Recipe Recipe by ccthefitnessblogDifficulty: EasyServings 24 servingsPrep time 5 minutesCooking timeminutesCalories 40 kcal Ingredients 1 cup refined coconut oil 1/2 cup unsweetened plant-based milk (such as almond or soy milk) 1/4 cup refined liquid coconut oil 1 teaspoon apple cider vinegar 1/2 teaspoon salt 1/4 teaspoon nutritional yeast (optional, for a slightly cheesy flavor) 1/4 teaspoon turmeric powder (optional, for a yellow color reminiscent of traditional butter) Directions Melt the coconut oil In a small saucepan, melt the refined coconut oil over low heat until it becomes completely liquid. Be careful not to overheat it. Combine the ingredients In a blender or food processor, combine the melted coconut oil, plant-based milk, liquid coconut oil, apple cider vinegar, salt, nutritional yeast (if using), and turmeric powder (if using). Blend on high speed until all the ingredients are well combined and the mixture is smooth and creamy. Chill and solidify Transfer the mixture into a container or mold of your choice. You can use an empty butter dish or silicone molds for individual portions. Place the container in the refrigerator and allow it to chill for at least two hours or until it solidifies. Store and use Once the vegan butter has solidified, it is ready to use. You can store it in the refrigerator for up to two weeks or freeze it for longer shelf life. Use it as a spread on bread, in baking recipes, or for sautéing and frying. Notes For Storing, You can store it in the refrigerator for up to two weeks or freeze it for longer shelf life. Use it as a spread on bread, in baking recipes, or for sautéing and frying. For Spreading, You can scoop out desired amount, sit out of fridge for a few minutes to soften up like regular butter. It is important to note that while homemade vegan butter can be a healthier alternative to dairy butter, it should still be consumed in moderation. Like any other high-fat food, excessive consumption may lead to weight gain and other health issues. It is always recommended to consult with a healthcare professional or registered dietitian for personalized dietary advice. In conclusion, homemade vegan butter is a versatile and customizable plant-based spread that provides a delicious alternative to traditional dairy butter. With its creamy texture and rich flavor, it can be used in various cooking and baking applications. By making your own vegan butter at home, you have control over the ingredients and can contribute to a more sustainable food system. In conclusion, homemade vegan butter is a versatile and customizable plant-based spread that provides a delicious alternative to traditional dairy butter. With its creamy texture and rich flavor, it can be used in various cooking and baking applications. By making your own vegan butter at home, you have control over the ingredients and can contribute to a more sustainable food system. Share: Facebook Pinterest Email Social Media Facebook-f Youtube Pinterest Instagram Tiktok Most Popular Get The Latest Updates Subscribe To Our Weekly Newsletter No spam, notifications only about new post, updates. Categories On Key Related Posts