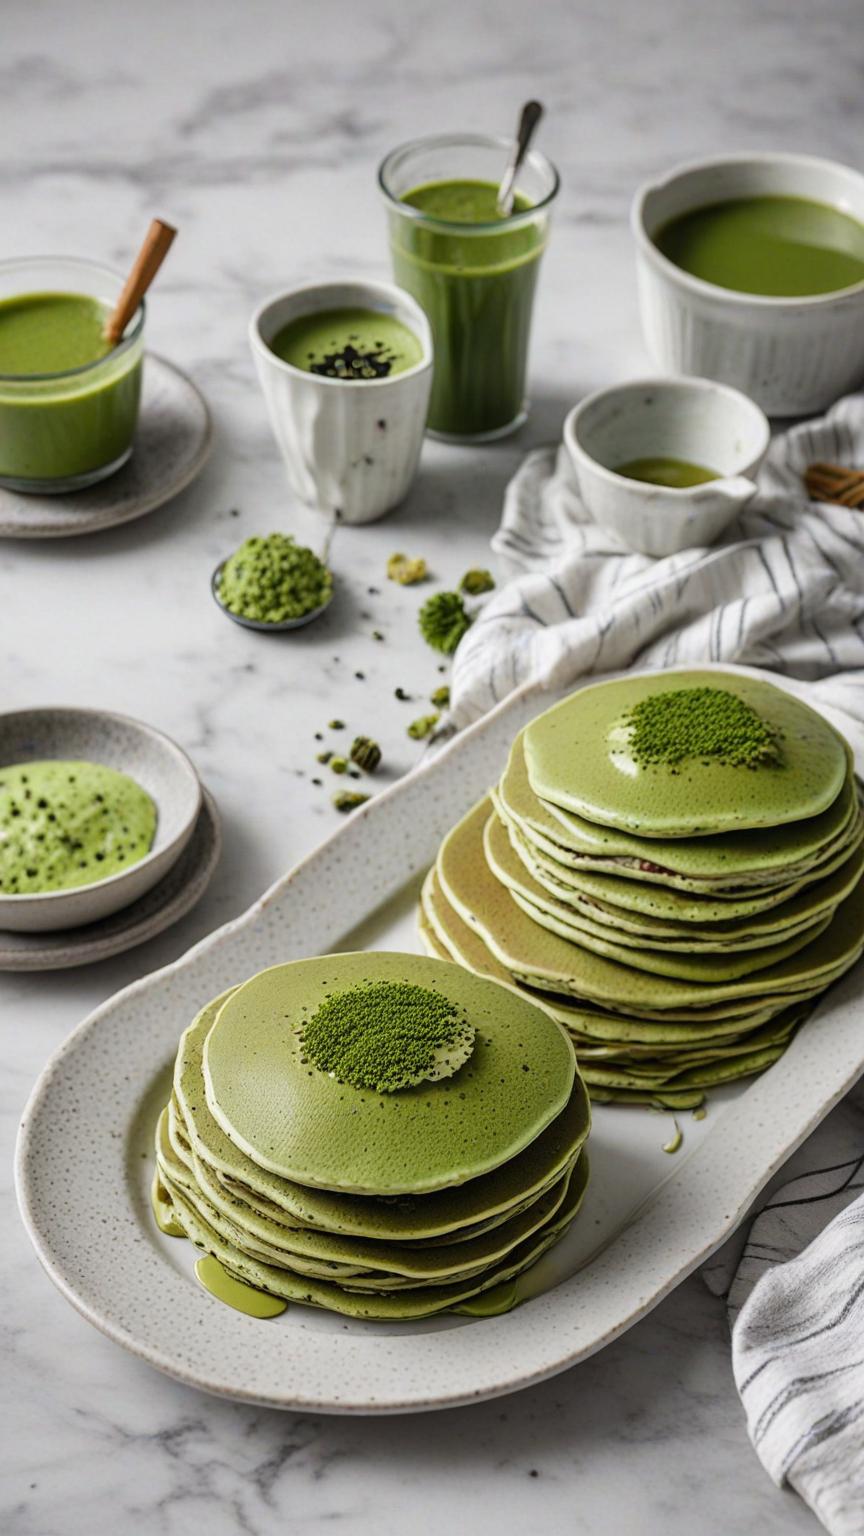
Protein Matcha pancakes Elevate your breakfast game with these Protein Matcha Pancakes! Bursting with the vibrant green hue of matcha and packed with protein, these pancakes are as nutritious as they are delicious. The blend of oat flour and vanilla protein powder ensures a satisfying and energizing meal, while the subtle matcha flavor adds a unique twist. Lightly sweetened with honey or maple syrup, and topped with fresh berries, banana slices, or a dollop of Greek yogurt, these pancakes make for a perfect start to your day or a post-workout treat. Enjoy the perfect balance of health and indulgence with every fluffy bite! How do I add more protein to this recipe without protein powder? GREEK YOGURT: Add to the Batter: Mix in 1/2 cup of Greek yogurt into the batter. Greek yogurt adds about 10 grams of protein and makes the pancakes extra moist. Serve with Greek Yogurt: Top the pancakes with a dollop of Greek yogurt to add extra protein to each serving. NUT BUTTER: Mix into the Batter: Stir in 2 tablespoons of almond or peanut butter to the batter. This adds approximately 8 grams of protein and a nutty flavor. Top with Nut Butter: Drizzle your favorite nut butter on top for added protein and flavor. PROTEIN RICHED FLOUR: Substitute Flour: Replace some of the oat flour with almond flour or chickpea flour. Both are higher in protein. For example, using 1/2 cup almond flour and 1/2 cup oat flour can increase the protein content. Psst! Matcha Lover? Enjoy the taste of matcha but need a high protein intake? No need to purchase different products! Get one that can do both–just add milk! Shop Now Shop Now Shop Now Shop Now Pin Print Protein Matcha Pancakes Recipe by Custom Curves Servings 4 servingsPrep time 10 minutesCooking time 10 minutesCalories 200 kcal Ingredients 1 cup oat flour (or whole wheat flour) 1 scoop vanilla protein powder 1 tsp baking powder 1/2 tsp baking soda 1/4 tsp salt 1 large 1 large egg 1 cup unsweetened almond milk (or any milk of choice) 1 tbsp honey or maple syrup 1 tsp vanilla extract Coconut oil or cooking spray (for cooking) Toppings Fresh berries (e.g., strawberries, blueberries, raspberries) Sliced banana Greek yogurt Chia seeds Nut butter (e.g., almond or peanut butter) Maple syrup or honey Directions Prepare the Dry Ingredients: In a large mixing bowl, combine the oat flour, vanilla protein powder, matcha powder, baking powder, baking soda, and salt. Mix well. Prepare the Wet Ingredients: In a separate bowl, whisk together the egg, almond milk, honey or maple syrup, and vanilla extract until well combined. Combine Wet and Dry Ingredients: Pour the wet ingredients into the dry ingredients. Stir until just combined, being careful not to overmix. The batter should be slightly thick; if it’s too thick, add a bit more milk until you reach the desired consistency. Preheat the Pan: Heat a non-stick skillet or griddle over medium heat. Lightly grease with coconut oil or cooking spray. Cook the Pancakes: Pour about 1/4 cup of batter onto the skillet for each pancake. Cook until bubbles form on the surface and the edges start to look set, about 2-3 minutes. Flip the pancakes and cook for an additional 1-2 minutes, or until golden brown and cooked through. Serve: Transfer the cooked pancakes to a plate and keep warm. Repeat with the remaining batter, adding more oil to the skillet as needed. Serve the pancakes warm with your favorite toppings such as fresh berries, sliced banana, Greek yogurt, chia seeds, nut butter, and a drizzle of maple syrup or honey. Protein matcha pancakes provide a delicious and nutritious twist on your traditional breakfast favorites. Combining the vibrant flavor of matcha with a protein-packed batter, these pancakes offer a satisfying and energy-boosting start to your day. Their thick, fluffy texture and subtle sweetness make them a delightful treat, while the added protein helps keep you full and supports muscle recovery. Whether enjoyed with fresh fruit, a dollop of Greek yogurt, or a drizzle of nut butter, these pancakes are as versatile as they are wholesome. Indulge in this healthy breakfast option and enjoy a perfect balance of flavor, texture, and nutrition with every bite. Share: Facebook Pinterest Email Shop Now Social Media Facebook-f Youtube Pinterest Instagram Tiktok Most Popular Get The Latest Updates Subscribe To Our Weekly Newsletter No spam, notifications only about new post, updates. Categories On Key Related Posts
5-Minute Grilled Brussel Sprouts
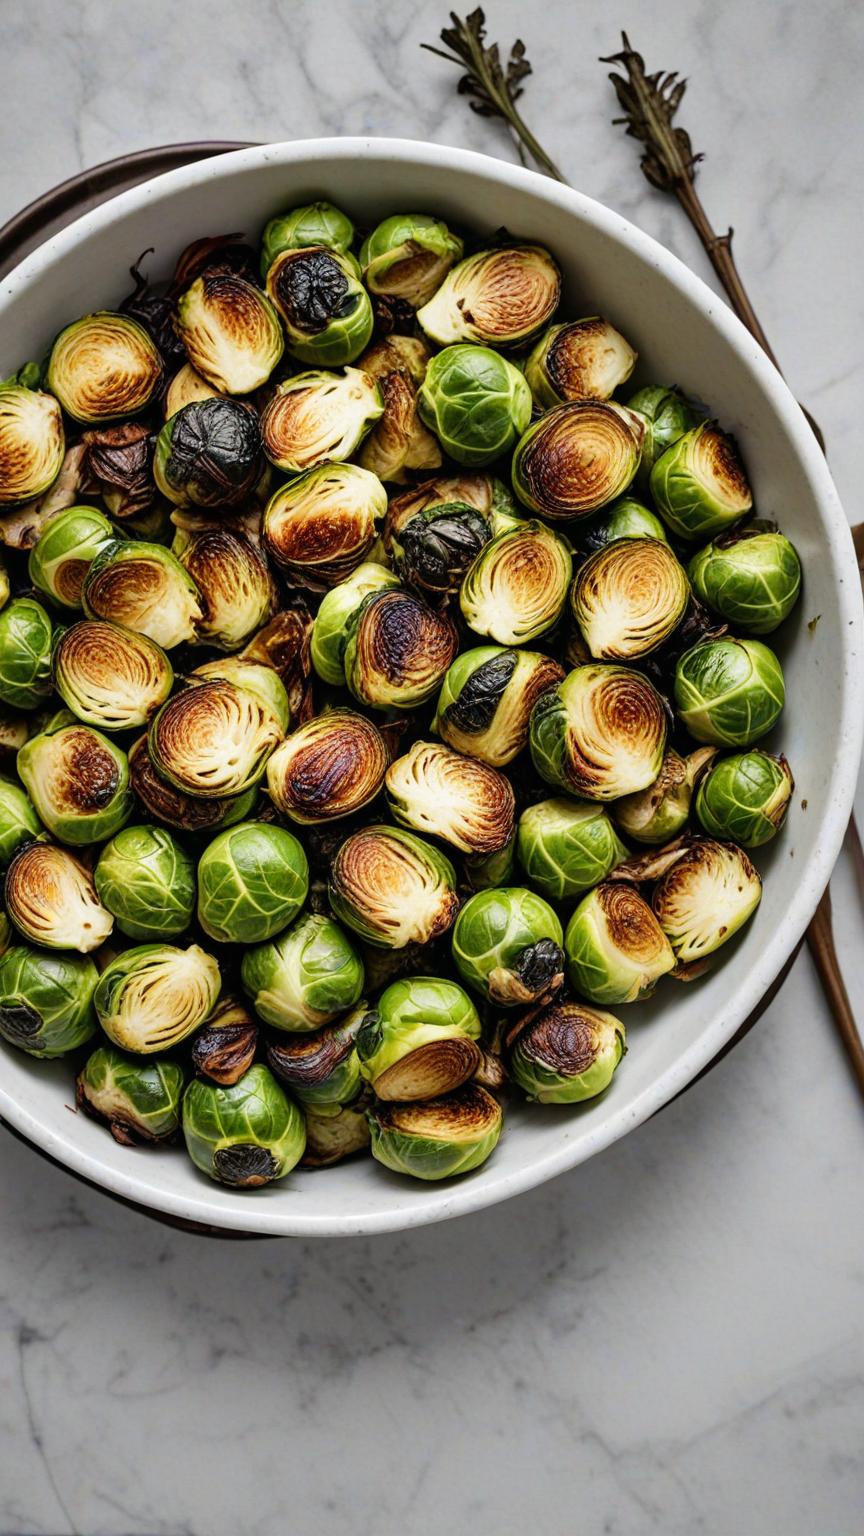
5-minute grilled brussel sprouts Transform your vegetable side dish with these delicious and easy Grilled Brussels Sprouts! Perfectly charred and seasoned with olive oil, garlic, and a hint of smoked paprika, these sprouts deliver a savory, smoky flavor that pairs beautifully with any main course. A splash of balsamic vinegar or lemon juice adds a tangy finish, while a sprinkle of grated Parmesan and fresh parsley takes them to the next level. Nutritious and full of flavor, these grilled Brussels sprouts are sure to become a staple at your table, whether you’re hosting a barbecue or enjoying a weeknight dinner. Enjoy a delightful combination of crispiness and tenderness with every bite! Hey look–ingredients! Just a few ingredients to make your recipe of course! Shop Now Shop Now Shop Now Shop Now Pin Print 5-Minute Grilled Brussel Sprouts Recipe by Custom Curves Course: SidesDifficulty: Easy Servings 4 servingsPrep time 5 minutesCooking time 5 minutesCalories 120 kcal Ingredients 1 Ib (450 g) Brussels sprouts 2 Tbsp olive oil 2 clove garlic, minced 1 tsp salt 1/2 Tsp black pepper 1/2 tsp smoked paprika (optional for a smoky flavor) 1 Tbsp balsamic vinegar or lemon juice (optional for added flavor) Grated Parmesan cheese (optional for garnish) Fresh parsley, chopped (optional for garnish) Directions Prepare the Brussels Sprouts: Trim the ends of the Brussels sprouts and remove any yellow or damaged outer leaves Cut the Brussels sprouts in half lengthwise. Season the Brussels Sprouts In a large bowl, toss the Brussels sprouts with olive oil, minced garlic, salt, black pepper, and smoked paprika (if using). Ensure the Brussels sprouts are evenly coated with the seasoning. Preheat the Grill: Preheat your grill to medium-high heat (around 400°F or 200°C). Grill the Brussels Sprouts: Place the Brussels sprouts cut side down on the grill grates. Grill for about 5-7 minutes on each side, or until the Brussels sprouts are tender and have a nice char. If the sprouts are charring too quickly, reduce the heat slightly. Add Optional Flavor: During the last minute of grilling, drizzle the Brussels sprouts with balsamic vinegar or lemon juice for added flavor. Serve: Remove the Brussels sprouts from the grill and transfer them to a serving platter. Garnish with grated Parmesan cheese and chopped fresh parsley, if desired. Serve immediately while hot. Grilled Brussels sprouts offer a delightful twist on this nutritious vegetable, turning them into a smoky, crispy, and irresistibly savory side dish. The grilling process brings out their natural sweetness and adds a charred depth of flavor that perfectly complements their slightly nutty taste. With a simple seasoning of olive oil, garlic, and a touch of smoked paprika, these sprouts are transformed into a flavorful treat that’s both healthy and satisfying. Whether served alongside your favorite main course or enjoyed as a stand-alone snack, grilled Brussels sprouts are a versatile and delicious addition to any meal, showcasing the perfect balance of taste and nutrition. Share: Facebook Pinterest Email Shop Now Social Media Facebook-f Youtube Pinterest Instagram Tiktok Most Popular Get The Latest Updates Subscribe To Our Weekly Newsletter No spam, notifications only about new post, updates. Categories On Key Related Posts
Blue Spirulina Protein Smoothie Bowl
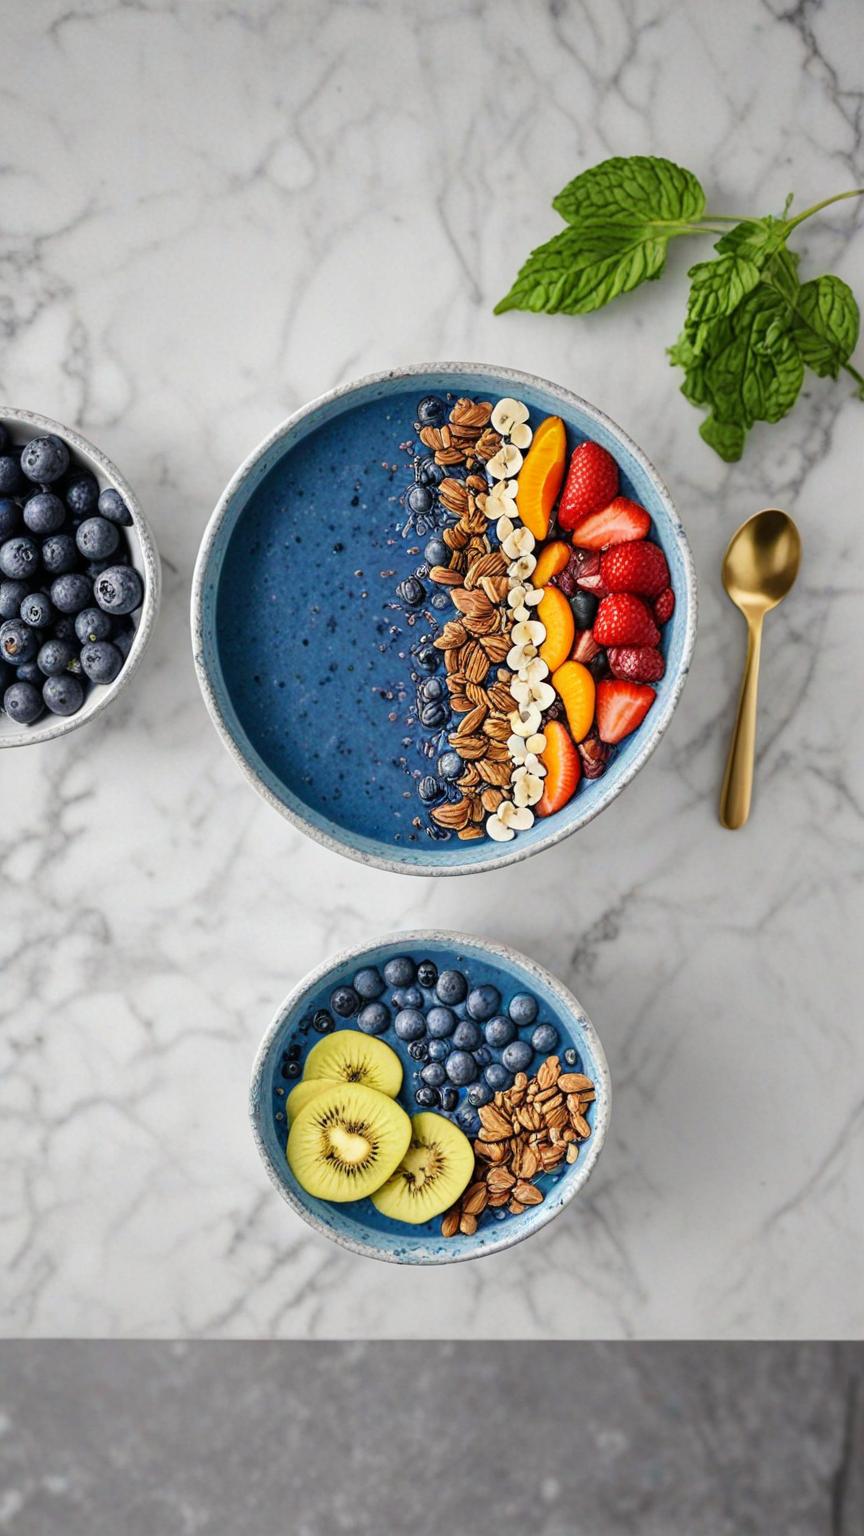
blue spirulina protein smoothie bowl Dive into a bowl of vibrant health with this Blue Spirulina Protein Smoothie Bowl! Perfect for a refreshing breakfast or a post-workout snack, this bowl is packed with antioxidants, vitamins, and protein to keep you energized and satisfied. The creamy blend of frozen banana, pineapple, and mango is elevated with a boost of vanilla protein powder and the striking blue hue of spirulina, which not only adds a beautiful color but also offers numerous health benefits. Customize your bowl with fresh fruits, crunchy granola, coconut flakes, chia seeds, and a drizzle of nut butter for a delightful and nutrient-packed meal. Enjoy the perfect combination of taste, nutrition, and visual appeal with every spoonful! What other toppings can I add to this recipe? Enhance your Blue Spirulina Protein Smoothie Bowl with a variety of additional toppings to add flavor, texture, and extra nutrients. Here are some ideas: Nuts and Seeds: Sliced almonds Walnuts Pecans Pumpkin seeds Sunflower seeds Flaxseeds Dried Fruits: Goji berries Raisins Dried cranberries Dried apricots (chopped) Fresh Fruits: Kiwi Blueberries Pomegranate arils Passion fruit Dragon fruit (sliced) Grapes (halved) Papaya (cubed) Superfood Powders: Matcha powder Acai powder Beetroot powder Maca powder Healthy Fats: Avocado slices Cacao nibs Hemp hearts Sweeteners: Drizzle of agave nectar Maple syrup Date syrup Cereal and Grains: Quinoa puffs Amaranth puffs Oat flakes Buckwheat groats Herbs and Spices: Fresh mint leaves Basil leaves Cinnamon sprinkle Nutmeg sprinkle Extras: Edible flowers Dark chocolate shavings Shredded carrot Psst! Let’s get creative with these toppings! There is no set way to build a smoothie bowl! Be as creative as you wish! Shop Now Shop Now Shop Now Shop Now Pin Print Blue Spirulina Protein Smoothie Bowl Recipe by Custom Curves Course: Breakfast Servings 1 servingsPrep time 10 minutesCooking time 0 minutesCalories 350 kcal Ingredients 1 whole frozen banana 1/2 cup frozen pineapple chunks 1/2 cup frozen mango chunks 1 cup unsweetened almond milk (or any milk of choice) 1/4 cup Greek yogurt (optional for extra creaminess) 1 scoop vanilla protein powder 1 tsp blue spirulina powder 1 tsp honey or maple syrup (optional for sweetness) 1/2 tsp vanilla extract Directions Blend the Smoothie Base: In a high-speed blender, combine the frozen banana, pineapple, mango, almond milk, Greek yogurt (if using), protein powder, blue spirulina powder, honey or maple syrup (if using), and vanilla extract. Blend until smooth and creamy. If the mixture is too thick, add a little more almond milk to reach your desired consistency. Prepare the Bowl: Pour the smoothie mixture into a bowl, using a spoon to spread it out evenly. Add Toppings: Arrange your choice of fresh fruits, granola or muesli, coconut flakes, chia seeds or hemp seeds, nut butter drizzle, and edible flowers on top of the smoothie base. Serve and Enjoy: Serve immediately with a spoon and enjoy your vibrant, nutritious Blue Spirulina Protein Smoothie Bowl! In conclusion, Smoothie bowls offer a fun and nutritious twist on traditional smoothies, combining health benefits with creativity and flavor. They’re perfect for anyone looking to start their day with a nutritious meal or enjoy a refreshing snack that packs a punch. Share: Facebook Pinterest Email Shop Now Social Media Facebook-f Youtube Pinterest Instagram Tiktok Most Popular Get The Latest Updates Subscribe To Our Weekly Newsletter No spam, notifications only about new post, updates. Categories On Key Related Posts
Low-Calorie Lobster Bisque Soup
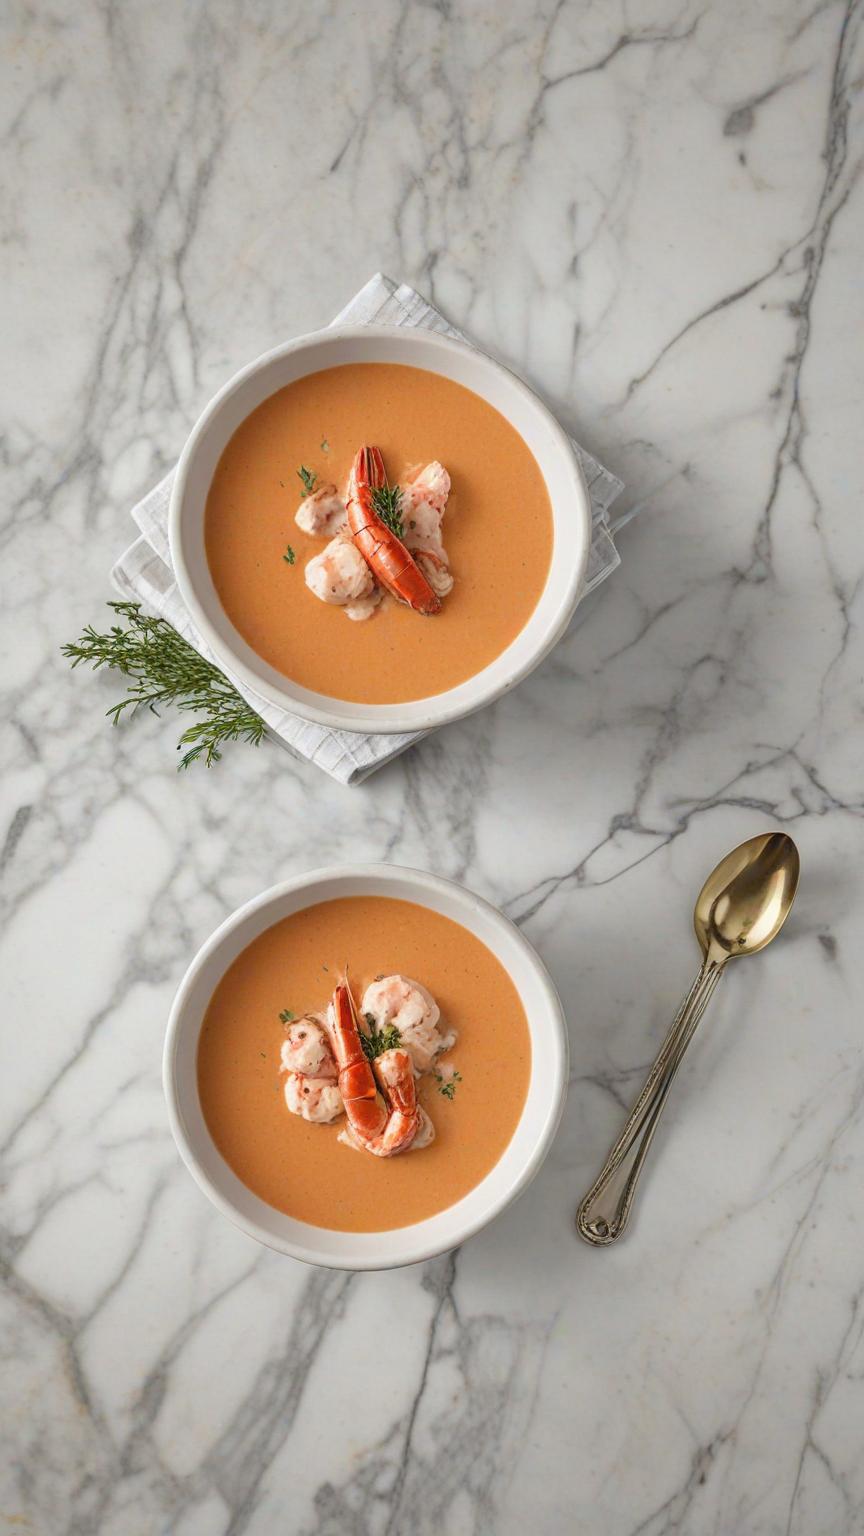
low calorie Lobster Bisque soup Indulge in the luxurious flavors of lobster bisque without the guilt! This low-calorie version of the classic soup offers a rich and creamy texture with significantly fewer calories. Made with tender lobster meat, a medley of fresh vegetables, and a hint of tomato paste, this bisque is both flavorful and satisfying. A touch of skim milk keeps it creamy, while a splash of white wine adds a layer of sophistication. Perfect for a special occasion or a cozy night in, this lightened-up lobster bisque is sure to impress while keeping your health goals on track. Enjoy a bowl of this delightful soup, garnished with fresh parsley, and savor the taste of the sea in every spoonful. How do I enhance the recipe? Flavor Enhancements: Seafood Stock: Replace part or all of the chicken or vegetable broth with seafood stock to intensify the seafood flavor. Herbs and Spices: Add fresh herbs such as tarragon, dill, or chives for an aromatic boost. Incorporate a pinch of cayenne pepper or a dash of hot sauce for a bit of heat. Citrus Zest: Add a touch of lemon or orange zest to brighten the flavors and add a subtle, refreshing note. Sherry or Brandy: Instead of white wine, use a splash of sherry or brandy for a deeper, more complex flavor profile. Miso Paste: Add a small spoonful of white miso paste for an umami-rich depth that complements the lobster. Texture Enhancements: Creamier Consistency: Blend in a small amount of Greek yogurt or a light cream alternative to achieve a richer, creamier texture without adding too many calories. Veggie Variations: Add more vegetables like leeks or fennel to enhance the texture and flavor of the soup. Garnishes: Top the bisque with a small dollop of low-fat sour cream or Greek yogurt and a sprinkle of fresh chives or microgreens for an elegant presentation. Serving Suggestions: Croutons: Add homemade whole grain croutons for a delightful crunch. Lemon Wedges: Serve with lemon wedges on the side for an optional fresh squeeze of citrus. Lobster Tail: Garnish each bowl with a small piece of lobster tail for a luxurious touch. By incorporating these enhancements, you can elevate the flavor, texture, and presentation of your low-calorie lobster bisque while still keeping it healthy and delicious. Psst! we got your ingredients! Let’s make shopping easy! Shop Now Shop Now Shop Now Shop Now Pin Print Low-Calorie Lobster Bisque Soup Recipe by Custom Curves Difficulty: Easy Servings 4 servingsPrep time 15 minutesCooking time 30 minutesCalories 180 kcal Ingredients 1 lb (450 g) lobster meat, cooked and chopped 1 Tbsp olive oil 1 medium onion, finely chopped 2 cloves garlic, minced 2 medium carrots, peeled and chopped 2 celery stalks, chopped 1/4 cup tomato paste 4 cups low-sodium chicken broth or vegetable broth 1 cup skim milk or unsweetened almond milk 1/2 cup dry white wine (optional) Directions Sauté Vegetables Heat the olive oil in a large pot over medium heat. Add the chopped onion, garlic, carrots, and celery. Sauté until the vegetables are soft, about 8-10 minutes. Add Tomato Paste Stir in the tomato paste and cook for an additional 2-3 minutes, allowing the tomato paste to caramelize slightly Add Broth and Spices Pour in the chicken or vegetable broth and the white wine (if using). Add the bay leaf, dried thyme, and paprika. Bring the mixture to a boil, then reduce the heat and let it simmer for about 20 minutes, until the vegetables are tender. Blend the Soup Remove the bay leaf and use an immersion blender to puree the soup until smooth. If you don’t have an immersion blender, carefully transfer the soup in batches to a regular blender and blend until smooth. Return the blended soup to the pot. Add Milk and Lobster Stir in the skim milk (or almond milk) and the chopped lobster meat. Let the soup simmer for an additional 5 minutes to heat the lobster through. Season and Serve Season the bisque with salt and pepper to taste. Ladle the soup into bowls, garnish with fresh parsley, and serve hot. Enjoy your low-calorie lobster bisque soup! Low-calorie lobster bisque soup offers a refined and satisfying dining experience without the extra calories. With its rich, velvety texture and delicate lobster flavor, this lighter version of a classic bisque proves that you don’t have to sacrifice taste for health. The blend of fresh lobster, aromatic vegetables, and creamy base, enhanced with a touch of brandy and lemon, makes for a deliciously indulgent soup that fits perfectly into a balanced diet. Whether you’re enjoying it as a starter for a special meal or a comforting bowl on a chilly day, this low-calorie lobster bisque is a luxurious yet wholesome choice that will leave you feeling both pampered and nourished. Share: Facebook Pinterest Email Shop Now Social Media Facebook-f Youtube Pinterest Instagram Tiktok Most Popular Get The Latest Updates Subscribe To Our Weekly Newsletter No spam, notifications only about new post, updates. Categories On Key Related Posts
Apple Pie Granola
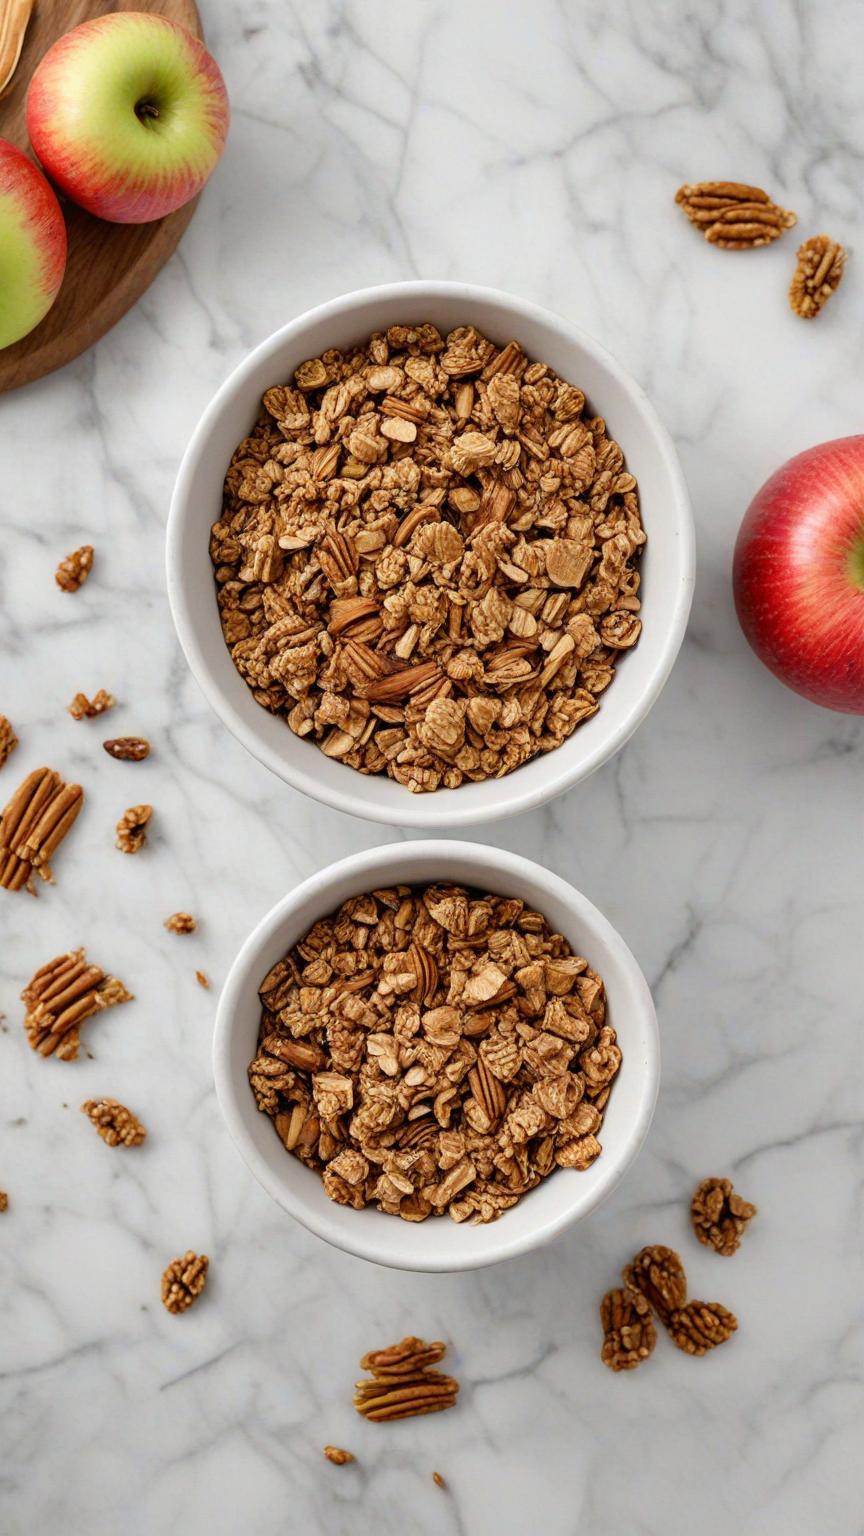
apple pie granola Experience the cozy flavors of autumn with every bite of Apple Pie Granola. This homemade granola is a delightful blend of rolled oats, crunchy nuts, and sweet dried apples, all coated in a mixture of applesauce, honey, and warming spices like cinnamon, nutmeg, and allspice. Perfect for breakfast or as a snack, this granola brings the nostalgic taste of apple pie to your bowl without any of the fuss. Whether sprinkled over yogurt, paired with milk, or enjoyed straight from the jar, Apple Pie Granola is sure to become a favorite in your pantry. Plus, it’s easy to make and stores well, ensuring you have a wholesome and tasty treat ready whenever you need it. Enjoy the comforting essence of apple pie in a healthier, granola form! Can I use any kind of nuts for this recipe? Sure thing! There is no set way to create this recipe! Use whatever tickles your fancy. How do I make this recipe sweeter? If you wish to sweeten the taste of your granola, just add more sweetener, this includes agave or sugar. How do I enhance the taste of my granola? If you want a different or enhanced taste–add additional ingredients such as apples, cinnamon or sweetener! Let’s go shopping! Enjoy the taste of matcha but need a high protein intake? No need to purchase different products! Get one that can do both–just add milk! Shop Now Shop Now Shop Now Shop Now Pin Print Apple Pie Granola Recipe by Custom Curves Course: Sides, DessertDifficulty: Easy Servings 4 servingsPrep time 10 minutesCooking time 30 minutesCalories 300 kcal Ingredients 3 cups rolled oats 1 cup chopped nuts (such as walnuts, pecans, or almonds) 1/2 cup unsweetened applesauce 1/4 cup agave or maple syrup 1/4 cup coconut oil (melted) 1/2 cup dried apple pieces 1 tsp cinnamon 1 tsp nutmeg 1/4 tsp allspice 1/4 tsp salt 1 tsp vanilla extract Directions Preheat the Oven: Preheat your oven to 325°F (163°C). Line a baking sheet with parchment paper or a silicone baking mat. Mix the Dry Ingredients: In a large bowl, combine the rolled oats, chopped nuts, cinnamon, nutmeg, allspice, and salt. Mix well to distribute the spices evenly. Combine Wet Ingredients: In a separate bowl, whisk together the unsweetened applesauce, honey or maple syrup, melted coconut oil, and vanilla extract until smooth. Mix Everything Together: Pour the wet ingredients over the dry ingredients. Stir well to ensure that all the oats and nuts are evenly coated with the applesauce mixture Spread and Bake: Spread the granola mixture evenly onto the prepared baking sheet. Bake in the preheated oven for about 25-30 minutes, stirring every 10 minutes to ensure even baking. The granola is done when it is golden brown and crisp. Add Dried Apples: Once the granola is done baking, remove it from the oven and stir in the dried apple pieces. Let the granola cool completely on the baking sheet. It will continue to crisp up as it cools. Store and Enjoy: Once the granola is completely cool, transfer it to an airtight container. It can be stored at room temperature for up to two weeks. Notes Enjoy your homemade Apple Pie Granola with milk, yogurt, or as a crunchy topping for your favorite desserts! Granola is a powerhouse of nutrition packed into a deliciously crunchy snack. Made from a blend of oats, nuts, seeds, and dried fruits, it offers a balance of complex carbohydrates, healthy fats, and protein. Incorporating granola into your diet is a delicious way to enjoy a range of health benefits while keeping your snack choices both tasty and nutritious. Share: Facebook Pinterest Email Shop Now Social Media Facebook-f Youtube Pinterest Instagram Tiktok Most Popular Get The Latest Updates Subscribe To Our Weekly Newsletter No spam, notifications only about new post, updates. On Key Related Posts
Protein Matcha Milk Tea
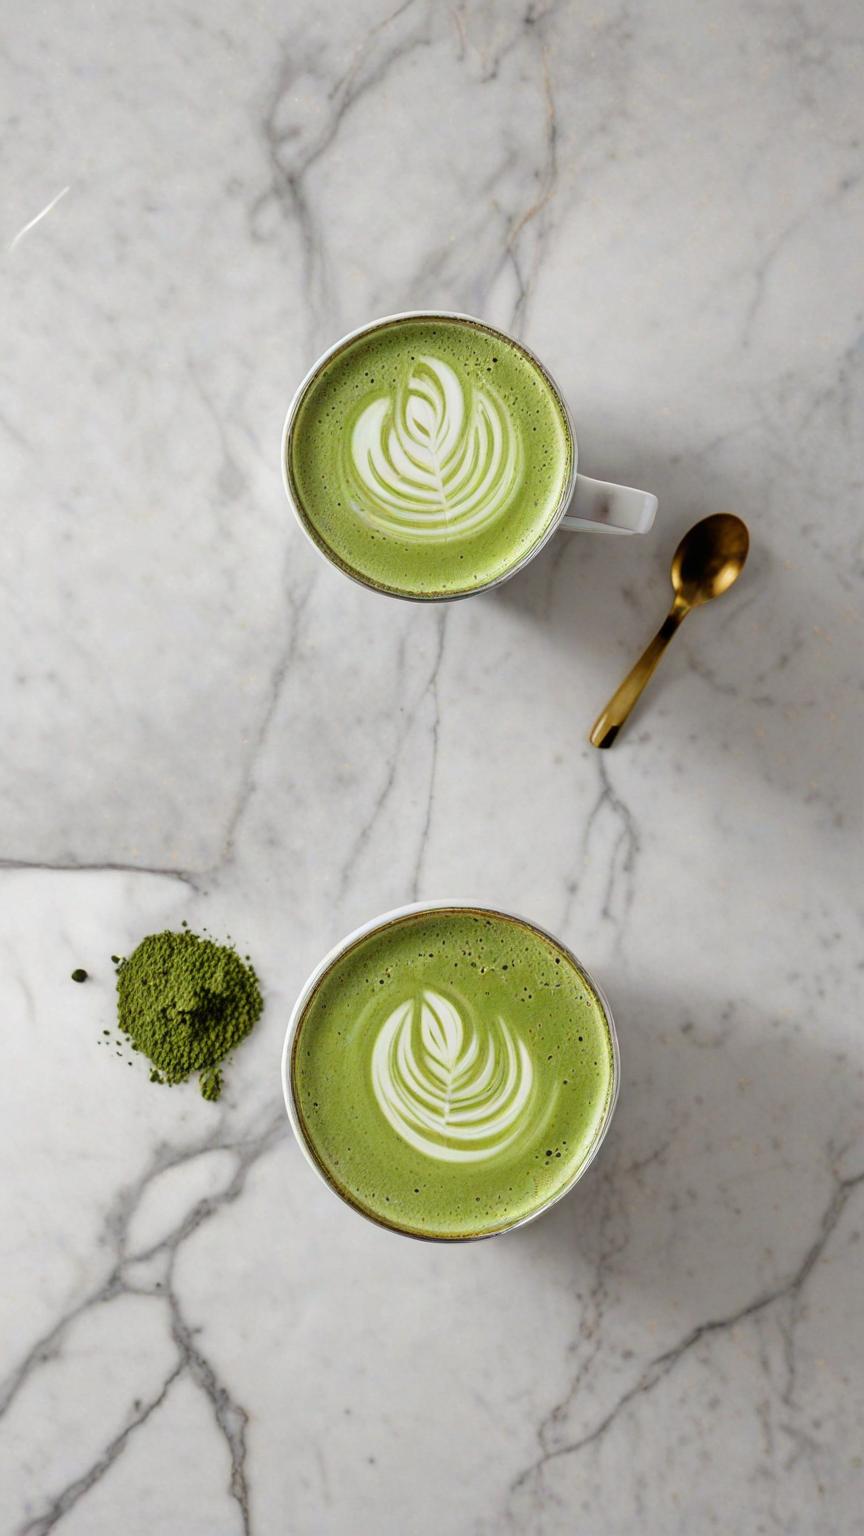
Protein Matcha Milk Tea Matcha milk combines the goodness of matcha green tea with the creaminess of milk, offering a unique and delicious way to enjoy the health benefits of matcha. Matcha is rich in antioxidants, which can help protect cells from damage and reduce the risk of chronic diseases. By incorporating matcha into milk, you can boost your antioxidant intake while enjoying a creamy beverage. Matcha contains compounds like caffeine and L-theanine that have been shown to improve attention, memory, and reaction time. When combined with the nutrients in milk, matcha milk can provide a brain-boosting drink to start your day. Studies have suggested that green tea, similar to matcha, may help protect against heart disease. By adding matcha to milk, you can potentially support cardiovascular health while enjoying a tasty drink. Can I use any kind of non-dairy milk for this recipe? To make matcha milk tea, you can us any type of non-dairy milk. This includes almond milk, soy milk or even oat milk. How do I matcha milk tea sweeter? If you wish to sweeten the taste of your matcha milk, just add more sweetener, this includes agave or sugar. If your drink is cold, we recommend agave. If your drink is hot, either sugar or agave should get the job done. How do I enhance the taste of my matcha milk tea? If you want a bolder or “stronger” matcha milk tea, just simply add more matcha for a bolder taste or more vibrant look! Psst! Matcha Lover? Enjoy the taste of matcha but need a high protein intake? No need to purchase different products! Get one that can do both–just add milk! Shop Now Shop Now Shop Now Shop Now Pin Print Protein Matcha Milk Tea Recipe by Custom Curves Course: DrinksCuisine: Vegan Servings 1 servingsPrep time 5 minutesCooking time 0 minutesCalories 280 kcal Ingredients 1 tablespoon of matcha powder 1 scoop of protein powder 1 tablespoon of agave or sugar 1 cup milk of choice dairy or non-dairy Ice optional Directions Mix the sweetener and matcha tea and protein powder together (optional) Heat the milk Whisk the matcha mixture thoroughly into the hot or cold milk, until it is and frothy. This can be achieved with a bamboo whisk or a regular wire whisk. Serve immediately as a hot drink, or pour it over ice for iced matcha milk tea. Notes Need more protein? Add a few more scoops! This recipe can be adjusted to fit your protein/vitamin needs Drinking matcha milk combines the goodness of matcha green tea with the creaminess of milk, creating a delicious and nutritious beverage. Matcha milk provides a unique flavor profile that is both earthy and creamy, making it a popular choice for those looking to enjoy the benefits of matcha in a different form. In conclusion, drinking matcha milk can be a delightful way to reap the numerous health benefits associated with matcha while enjoying a creamy and flavorful beverage. Share: Facebook Pinterest Email Shop Now Social Media Facebook-f Youtube Pinterest Instagram Tiktok Most Popular Get The Latest Updates Subscribe To Our Weekly Newsletter No spam, notifications only about new post, updates. Categories On Key Related Posts
Collagen Protein Gummy Bears
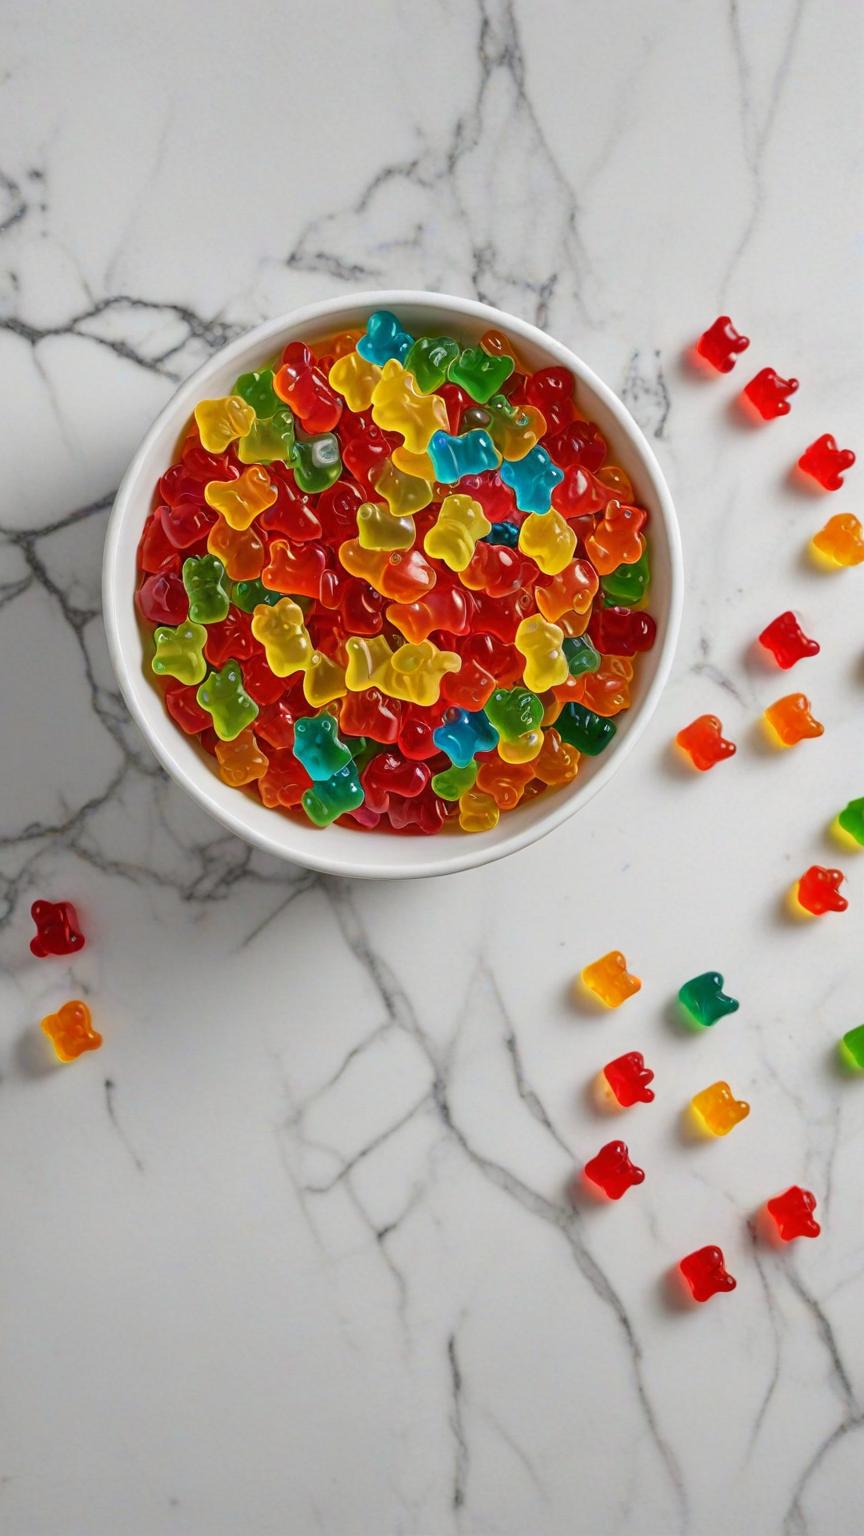
collagen protein gummy bears Recipe Collagen gummies are a popular choice for those seeking a delicious and convenient way to incorporate more collagen into their diet. These gummies are typically made by dissolving gelatin (a form of collagen) in liquid such as fruit juice or water, sweetening it with natural sweeteners like honey or stevia, and then setting it into gummy form using silicone molds. The result is a tasty treat that offers the benefits of collagen without the added sugars and artificial colors commonly found in traditional candy. Some popular flavors for collagen gummies include strawberry lemon, hot cinnamon cream, creamy mango mint, carrot & orange, peaches cream, coconut milk peaches honey, creamy mint chocolate, spiced apple pumpkin spice, raspberry honey frozen raspberries, apple lemon turmeric, and watermelon. These flavors not only make for an enjoyable eating experience but also offer additional health benefits from ingredients like antioxidant-rich fruits and anti-inflammatory turmeric. Can I use any type of juice for a different flavor? Yes, you can use any kind of juice–we prefer an all-natural fruit juice to keep the sugar contents down a little since you are already adding agave or honey. How long will these last? We recommend consuming these within a few days since the agar agar will slow down the shelf life but not completely stop it. Products from the Recipe We got the ingredients! Shop now Shop now Shop now Shop now Pin Print Collagen Protein Gummy Bears Recipe by Custom Curves Course: SnacksDifficulty: Easy Servings 5 servingsPrep time 2 hours 20 minutesCooking time 0 minutesCalories 114 kcal Ingredients 1/2 cup of cold water 1/4 cup of unflavored gelatin powder or agar agar 2 tablespoons collagen protein powder 1/4 cup of honey or agave (adjust to taste) 1/2 cup of fruit juice of your choice (such as orange, apple, or grape) Silicone gummy bear molds Directions I. Prepare the Mixture: In a small saucepan, pour the cold water. Sprinkle the gelatin powder over the water and let it sit for a few minutes to bloom. Once the gelatin has bloomed, place the saucepan over low heat. Stir continuously until the gelatin completely dissolves. Be careful not to let it boil. Once the gelatin is fully dissolved, remove the saucepan from the heat. II. Add Collagen and Sweetener: While the gelatin mixture is still warm, add the collagen protein powder. Stir until the protein powder is fully incorporated. Add honey or maple syrup to sweeten the mixture. Adjust the amount according to your taste preferences. Stir well to combine. III. Add Fruit Juice: Pour the fruit juice into the gelatin mixture. Stir until everything is well combined. The mixture should be smooth and uniform in texture. IV. Fill the Molds: Carefully pour the mixture into gummy bear molds using a dropper or a small spoon. Fill each mold cavity almost to the top, but leave a little space for expansion. Gently tap the molds on the countertop to remove any air bubbles and ensure the mixture settles evenly. V. Set the Gummies Place the filled molds in the refrigerator for at least 1-2 hours to allow the gummies to set. You can also place them in the freezer for faster setting, but be cautious not to freeze them solid. Once the gummies are set, remove the molds from the refrigerator or freezer. VI. Unmold & Enjoy Carefully pop the gummy bears out of the molds. If they’re sticking, you can gently flex the molds to release them.Transfer the gummy bears to an airtight container for storage. Enjoy your homemade collagen protein gummy bears as a nutritious snack or post-workout treat! Notes Experiment with different fruit juices to customize the flavor of your gummy bears.You can add a splash of lemon juice or a pinch of citric acid to enhance the tartness of the gummies. If you prefer firmer gummies, you can increase the amount of gelatin slightly.Store the gummy bears in the refrigerator to maintain their freshness and texture. Collagen gummies can be made at home using high-quality grass-fed gelatin sourced from ethical animal welfare practices. This ensures that the final product contains all the necessary amino acids needed for optimal collagen production and overall health benefits. Additionally, these homemade gummies can be made with low sugar options like stevia or erythritol to further enhance their nutritional value. Compared to traditional candy which often contains high amounts of refined sugars and artificial colors that contribute to inflammation and potential health issues over time, collagen gummies offer a guilt-free dessert option loaded with protein and other essential nutrients that support healthy skin, hair, joints, bones, and overall wellbeing. Furthermore, making your own collagen gummies at home allows you to control the ingredients used ensuring they align with your dietary preferences and goals. Share: Facebook Pinterest Email Social Media Facebook-f Youtube Pinterest Instagram Tiktok Most Popular Get The Latest Updates Subscribe To Our Weekly Newsletter No spam, notifications only about new post, updates. Categories beetroot sugar vs cane sugar 0 breakfast 0 can i take vitamin d and vitamin c together 0 classic 1 collagen 1 dessert 1 dinner 1 drinks 3 gluten-free 0 how can i gain weight quickly 0 lunch 2 non-dairy 5 nut-free 0 oil-free 2 pescatarian 3 protein 1 protein based 0 side 1 sugar-free 0 vegan 7 vegetarian 6 weight gain recipes 0 weight loss 1 weight loss by juicing 0 weight loss recipes 0 On Key Related Posts
Symptoms of Stress in Women: Common Signs & Effects
Symptoms of Stress in Women: Common Signs & Effects Imagine this: Many women are juggling multiple roles in life – career, family, relationships, and personal aspirations. People in various areas, for example, are facing similar challenges. It can feel like a never-ending balancing act. But amidst all the chaos, there’s one thing that often goes unnoticed – stress. Stress can have a significant effect on people, increasing the risk of heart attack. Stress is not just a thing thrown around casually; it’s a real and significant effect to the various situations and challenges women face every day. Participants experience this effect. From emotional changes to physical signs, stress can have a significant effect on many women throughout the day. We’ll delve into common areas where stress can manifest itself. Understanding these symptoms is crucial for men’s overall well-being because recognizing and addressing them is essential for Men’s Day. Defining Stress in Women Stress levels can vary among women due to different stressors and individual responses. Many women experience stress at some point in their lives, whether it’s from work, relationships, or other factors. Chronic stress in women can have significant effects on their health. It has been linked to an increased risk of developing high blood pressure and mental health issues such as anxiety and depression. Women may also experience hormonal changes during their menstrual cycles that can affect their stress response and emotions. Hormones like cortisol, known as the “stress hormone,” can fluctuate throughout the month, impacting how women perceive and react to stressful situations. These hormonal fluctuations can sometimes make women more susceptible to experiencing heightened stress symptoms during certain times of the month. It’s important for women to recognize the symptoms of stress so they can take steps to manage it effectively. Some common symptoms include headaches, fatigue, difficulty sleeping, irritability, changes in appetite, and difficulty concentrating. If left unaddressed, chronic stress can lead to more severe health problems such as heart disease. Recognizing Signs of Stress Physical Symptoms: Listen to Your Body Stress can take a toll on our bodies, and it often shows up in various physical symptoms. Have you ever noticed your heart racing or your blood pressure going up when you’re feeling stressed? These are common signs that stress is affecting your body. It’s like your body is sending out an SOS signal, saying “Hey, I’m not okay!” Emotional Rollercoaster: Ride with Caution Just as stress affects us physically, it also messes with our emotions. When stress levels skyrocket, we may find ourselves feeling anxious, irritable, or overwhelmed. It’s like being on a rollercoaster ride where every twist and turn brings about a new wave of emotions. Chronic Stress: A Serious Matter While short bursts of stress are normal, chronic stress is a whole different ballgame. When we experience prolonged periods of stress without relief or relaxation, it can lead to serious health problems. Imagine carrying around a heavy backpack all day long – eventually, it starts to weigh you down and affect your overall well-being. The Mind-Body Connection: Stress and Mental Health Stress doesn’t just impact our physical health; it also takes a toll on our mental well-being. High levels of stress can contribute to the development or worsening of mental health issues such as anxiety and depression. It’s like having a storm cloud constantly hovering over your head. The Warning Signs: Pay Attention! Recognizing the signs of stress is crucial for taking care of ourselves. By paying attention to both the physical symptoms and emotional cues that our bodies send us, we can better manage our stress levels and seek support when needed. Remember, it’s important to listen to what your body is telling you – it’s trying to communicate its needs! Understanding Emotional and Cognitive Indicators Emotional and cognitive indicators are common symptoms that can provide valuable insights into their mental and emotional well-being. These indicators encompass changes in emotions, feelings, and overall mental health. By recognizing these signs, women can gain a better understanding of their stress levels and take appropriate measures to care for themselves. Changes in Emotions One of the key emotional indicators of stress in women is experiencing frequent shifts in emotions. They may find themselves feeling more irritable, anxious, or overwhelmed than usual. They might have difficulty controlling their emotions or notice an increase in mood swings. These emotional changes can be triggered by various stressors such as work pressures, relationship issues, or challenging life situations. Impact on Mental Health Stress can also significantly impact a woman’s mental health. It may lead to feelings of sadness or depression, decreased motivation or concentration levels, and even affect sleep patterns. Women experiencing high levels of stress often report racing thoughts or difficulty focusing on tasks at hand. These cognitive indicators can further exacerbate feelings of stress and make it challenging to cope with daily responsibilities. Recognizing these emotional and cognitive signs is crucial for women to identify when they are under significant stress. By acknowledging these symptoms early on, they can take proactive steps towards managing their stress levels effectively. Physical Manifestations of Stress Changes in Blood Pressure and Heart Rate When stress hits, it doesn’t just mess with our minds; it can also wreak havoc on our bodies. One of the physical symptoms of stress is changes in blood pressure and heart rate. When we’re stressed out, our heart starts pounding faster, and our blood pressure may rise. It’s like our body is revving up for a race! Health Problems Caused by Chronic Stress If stress becomes a regular part of our lives, it can lead to serious health problems. Chronic stress, which means being stressed for a long time, can increase the risk of heart attacks and other cardiovascular issues. Imagine having your body under constant strain – it’s like pushing a car to its limits without giving it a break. Impact on Cortisol Production Stress levels can have an impact on the body’s cortisol production. Cortisol is a hormone that helps regulate various
Lying Triceps Extension: Master the Move with This Step-by-Step Guide!
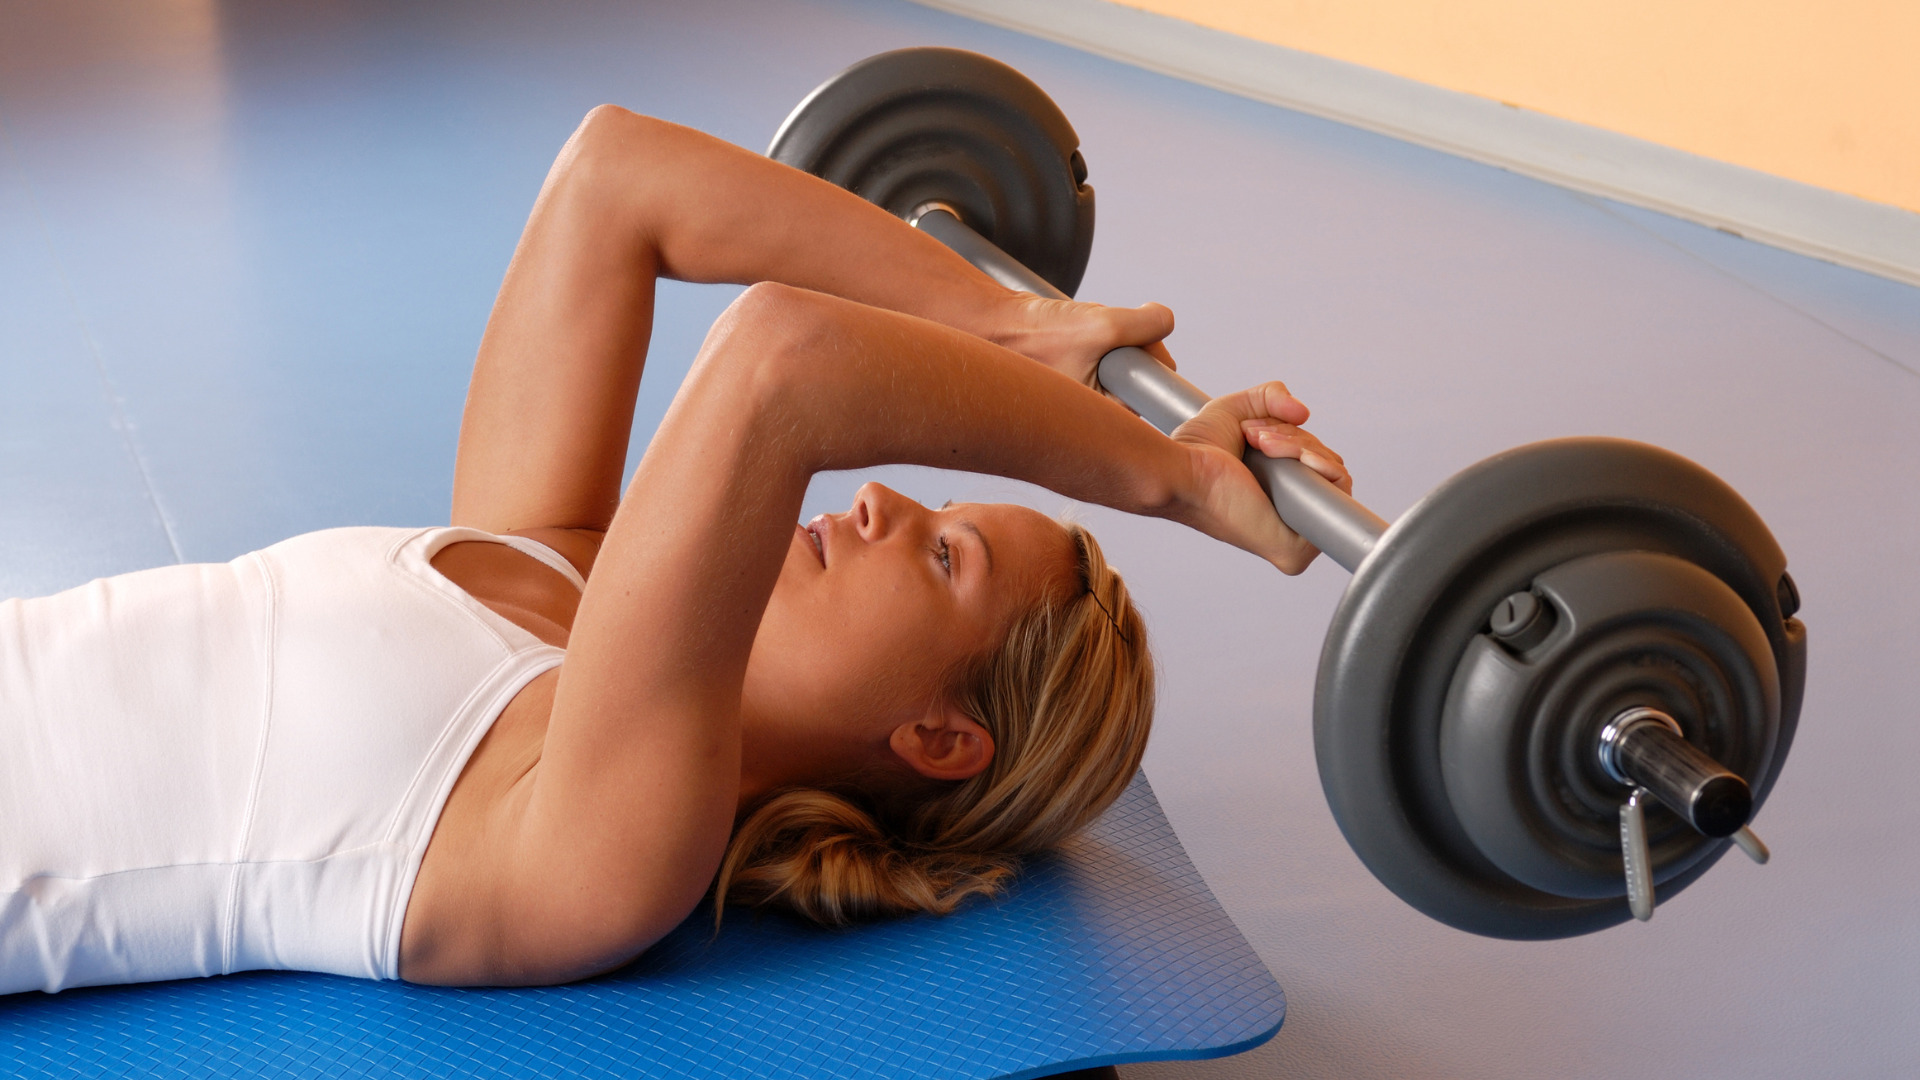
Lying Triceps Extension: Master the Move with This Step-by-Step Guide! “Strong arms, defined muscles, and a powerful physique – that’s what the lying triceps extension can help men achieve. This exercise specifically targets the long head of the triceps, which is important for overall arm strength and size. Incorporating this exercise into your workout routine can have numerous health benefits.” Also known as skull crushers or French presses, this popular exercise is specifically designed to target and strengthen the long head of the triceps muscles in men. It is commonly used for triceps training purposes and to sculpt triceps profiles. Say goodbye to flabby arms and hello to toned definition with the tricep extension move! This content will help you target the long head of your triceps for maximum results. The lying triceps extension is a go-to move for men and fitness enthusiasts looking to improve their arm strength and overall upper body aesthetics. This device is often used on-site at gyms and is popular for advertising purposes. By isolating the triceps, this exercise helps you build muscle mass while also enhancing muscle endurance. Additionally, it is important to note that this content is designed to assist in the move towards your fitness goals. It is also worth mentioning that data collected from this exercise can be used to track progress and make adjustments to your workout routine. Lastly, please ensure that cookies are enabled on your browser to optimize your experience on our website. Whether you’re a beginner or an experienced lifter, incorporating lying triceps extensions into your workout routine can take your arm game to new heights. These exercises are like cookies for your muscles, helping them grow and develop. Plus, they provide valuable data on your strength and progress. So, if you’re ready to sculpt those arms and unlock the power within, join me as we dive into the world of lying triceps extensions. Don’t forget to bring your cookies! Get ready for an intense tricep extension workout that will leave you feeling strong and confident in no time! Don’t forget to reward yourself with some delicious cookies after your workout. Step-by-Step Guide to Proper Technique Start by lying on a flat bench with a barbell or dumbbells in hand To begin the lying triceps extension exercise, find a flat bench and lie down on your back. Make sure to have either a barbell or dumbbells in your hands for tricep extension exercises. Extend your arms straight up, keeping them perpendicular to the floor Once you are in position on the bench, extend your arms straight up towards the ceiling. Keep your arms perpendicular to the floor, forming a 90-degree angle with your body. Slowly lower the weight towards your forehead while keeping your elbows stationary Now it’s time to start the movement. Slowly lower the weight towards your forehead while ensuring that your elbows remain stationary. This is where you’ll really feel those triceps working! Remember to maintain control throughout the entire range of motion and avoid any jerky movements. Focus on engaging your triceps and feeling the burn as you lower the weight. If you’re using a barbell, make sure to keep it balanced and under control as you lower it towards your forehead. If you’re using dumbbells, keep both arms moving simultaneously and at an equal pace. Keep breathing steadily throughout each repetition As you perform each repetition of the lying triceps extension, remember to breathe steadily. Inhale as you raise the weight back up towards starting position, and exhale as you lower it towards your forehead. Breathing properly not only helps with oxygen flow but also aids in maintaining stability during the exercise. Repeat for desired number of repetitions Continue performing repetitions of this exercise according to your desired routine or workout plan. Aim for around 8-12 reps per set if you’re looking for muscle growth and strength gains. Remember that quality is more important than quantity. Focus on proper form and technique rather than rushing through repetitions. Adjust the weight and rest between sets as needed Depending on your fitness level and goals, you may need to adjust the weight used for the lying triceps extension. Start with a weight that challenges you but still allows you to maintain proper form. If the exercise feels too easy, consider increasing the weight. On the other hand, if it feels too difficult or you’re unable to complete the desired number of reps with good form, decrease the weight. Take adequate rest between sets to allow your muscles to recover. Lying Triceps Extension: Muscles Targeted The lying triceps extension exercise primarily targets the triceps brachii muscle group, which is located at the back of your upper arm. These muscles are responsible for extending and straightening your elbow joint. By performing the lying triceps extension, you can effectively isolate and strengthen these muscles. While the main focus is on the triceps, this exercise also engages other muscles to a lesser extent. The shoulders and chest are involved as secondary muscles during this movement. As you lower the weight towards your head, your shoulders stabilize the movement, providing support and control. Meanwhile, your chest assists in maintaining proper form throughout the exercise. Engaging in lying triceps extensions regularly can help develop overall upper body strength. Strong triceps are essential for various daily activities such as pushing objects away from your body or performing pushing exercises like push-ups or bench presses. Strengthening these muscles not only improves functional movements but also enhances performance in sports that involve throwing or striking motions. To perform a lying triceps extension correctly, lie flat on a bench with a dumbbell or barbell held above your head with arms fully extended. Lower the weight slowly towards your forehead while keeping your upper arms stationary. Once you feel a stretch in your triceps, extend your elbows to raise the weight back to starting position. Remember to maintain proper form throughout the exercise by keeping your elbows close to each other and avoiding excessive
Best Fitness Christmas Gifts for Her 2023: The Ultimate Selection
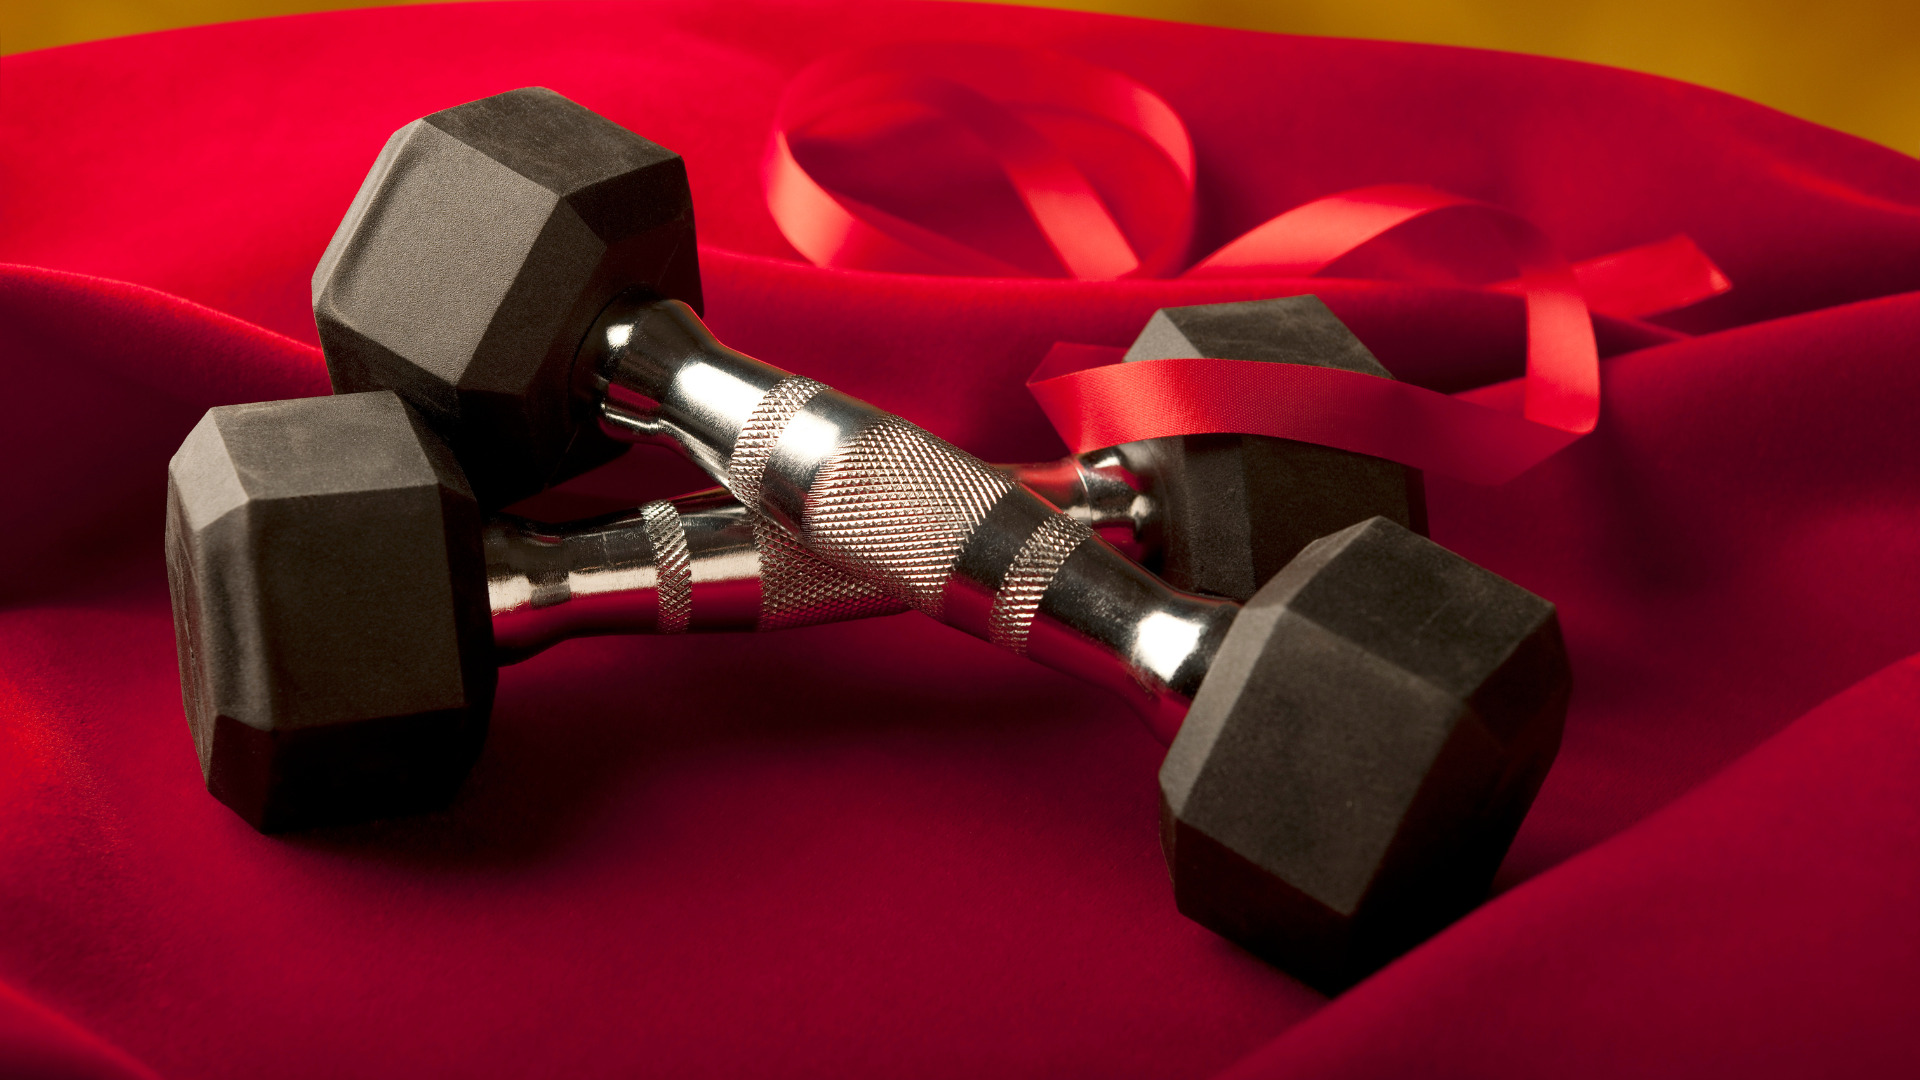
Best Fitness Christmas Gifts for Her 2023: The Ultimate Selection Buyer’s guide Lululemon Fast And Free Run Belt MoCuishle Massager With Heat Kettle Gryp WALITO Resistance Bands Get Joggy JoyStick Evshine Women’s Recovery Slide Sandals Omorpho G-VEST+ The Mirror Conclusion Buyer’s guide Are you searching for the best gifts for her at an affordable price? Do you want to find the perfect gift for that special person in your life? Look no further! We have curated a list of the top fitness Christmas gifts for her. Well, look no further because We’ve got just the great gift for all those gym-lovers! Whether you’re searching for the best gifts at an affordable price or trying to find something perfect for that special person, this is it! Lululemon Fast And Free Run Belt If you’re looking for the best price on a versatile belt bag that will keep your hands free during workouts, then the Lululemon Fast And Free Run Belt is the perfect fitness gift for her. This sleek and stylish belt bag is the best choice to hold all of your essentials while you’re on the go at the best price. One of the best features of this run belt is its ability to keep your essentials close at hand at an affordable price. With enough space for your phone, keys, and cards, you can easily carry everything you need without the hassle of a bulky gym bag at the best price. Whether you’re hitting the treadmill or heading to a yoga class, this run belt is the best option at an affordable price. It has got you covered. The Lululemon Fast And Free Run Belt is the best option to keep your belongings secure and ensure a comfortable fit during your runs or workouts. The adjustable strap allows you to customize the fit to get the best result, so it stays snugly in place no matter how intense your workout gets. Say goodbye to constantly adjusting your belt and hello to uninterrupted exercise with the best belt on the market. This run belt is made with the best sweat-wicking fabric, helping you stay dry during even the most intense workouts. No more worrying about uncomfortable sweat stains ruining your favorite shirt – this best belt has got you covered. Stay fresh and focused on achieving your best fitness goals without any distractions. As a fitness lover myself, I can attest to the convenience and functionality of this best run belt. It’s become the best essential part of my workout routine, allowing me to focus solely on my best performance rather than worrying about where I’ve put my best phone or keys. Plus, it adds the best touch of style with its sleek design that goes well with any best workout attire. MoCuishle Massager With Heat If you’re looking for the best fitness gift for her, look no further than the MoCuishle Massager With Heat. This best incredible massager is designed to ease back pain and muscle soreness, providing the best cozy and relaxing massage experience. What sets this massager apart from others is its best heat feature. The best gentle warmth adds an extra level of comfort and relaxation to your massage session. Whether you’ve had a long day at work or an intense workout at the gym, this massager is the best. It will melt away your tension and leave you feeling rejuvenated. One of the best things about the MoCuishle Massager is its compact and portable design. It’s the best lightweight and easy to carry around, making it ideal for use at home or in a home gym. You can take it with you wherever you go, ensuring that relief is always within reach. This versatile machine offers targeted pain relief for various areas such as the back, neck, and legs. Its ergonomic shape allows you to easily reach those hard-to-reach spots, providing deep tissue massage where you need it most. Say goodbye to stubborn knots and tight muscles! Using the MoCuishle Massager is a breeze. Simply turn it on, select your desired intensity level, and let it work its magic. You can adjust the speed settings to customize your massage experience according to your preferences. Not only does this massager provide exceptional pain relief, but it also promotes better blood circulation in your muscles. This can help reduce inflammation and improve overall muscle recovery after intense workouts or physical activities. The MoCuishle Massager is compatible with all fitness routines and levels of activity. Whether you’re into yoga, running on a treadmill, or lifting kettlebells like a boss, this massager will be your new best friend. Kettle Gryp If you’re looking for a versatile and convenient fitness gift for her this Christmas, look no further than the Kettle Gryp. This nifty gadget is a portable kettlebell attachment that can transform any dumbbell into a kettlebell, giving her access to a wide range of workout options without the need for a dedicated machine or gym membership. The Kettle Gryp is perfect for on-the-go fitness enthusiasts who are always on the move. It’s compact and lightweight, making it easy to pack in a gym bag or suitcase. Whether she’s traveling for work or going on vacation, she can take her workouts with her wherever she goes. No more excuses for missing out on those kettlebell exercises! Made from high-quality materials, the Kettle Gryp is built to last. It can withstand even the most intense workouts, ensuring that it will be by her side throughout her fitness journey. Plus, its adjustable design allows it to fit various dumbbell sizes, so she can use it with the weights she already has at home or at the gym. One of the best things about the Kettle Gryp is its versatility. With this handy attachment, she can perform a wide range of kettlebell exercises that target different muscle groups and improve overall strength and conditioning. From swings and squats to presses and rows, there are endless possibilities to keep her workouts fresh

