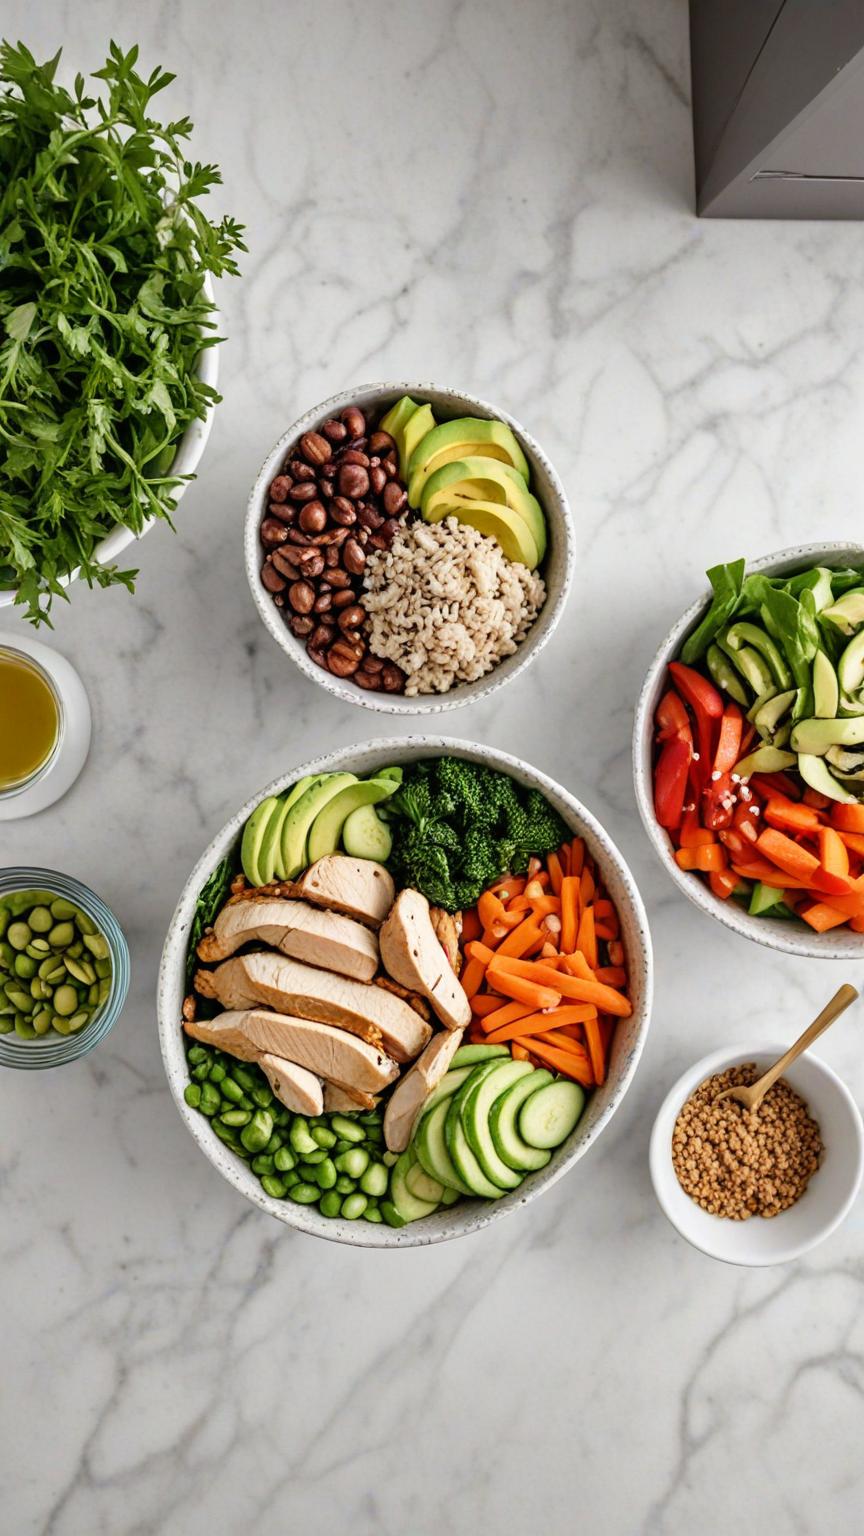
chicken Buddha Bowl Chicken Buddha bowls are a vibrant and nutritious meal option, perfect for a balanced diet. These bowls typically feature a base of grains like quinoa or brown rice, topped with succulent grilled or roasted chicken. They are packed with an array of fresh and colorful vegetables, such as spinach, carrots, cucumbers, and avocado, offering a variety of textures and flavors. Often finished with a drizzle of tangy dressing or a dollop of hummus, Chicken Buddha bowls provide a satisfying combination of protein, fiber, and healthy fats. Ideal for meal prep or a quick weeknight dinner, they are a delicious way to enjoy a wholesome and balanced meal. Can I use any type of toppings? Of course, the more the merrier! We do recommend if you wish to keep the calorie count down, reframe from additional toppings. Can I make this recipe without chicken? Yes! You can substitute with shrimp, salmon, beef, lamb, or whatever. Or you do not have to substitute at all–just omit the first part of the ingredients and the instructions of this recipe. Psst! Try these dressings! Best thing about budhha bowls is a there are no rules–you dress it how ever you want! Shop Now Shop Now Shop Now Shop Now Pin Print Chicken Buddha Bowl Recipe by Custom Curves Course: Dinner, LunchDifficulty: Medium Servings 4 servingsPrep time 30 minutesCooking time 40 minutesCalories 300 kcal A Nutritious and Flavorful Recipe: Vegetable Buddha Bowl Lunch with Chicken, Quinoa, Chickpeas, Mushrooms, Lettuce, and Tomatoes Ingredients For Chicken 2 whole boneless, skinless chicken breasts 1 Tbsp olive oil 1 tsp paprika 1/2 tsp garlic powder Salt and pepper to taste For the Quinoa 1 cup quinoa 2 cups water or vegetable broth Salt to taste For the chickpeas 1 can (15 ounces) chickpeas (garbanzo beans), drained and rinsed 1 Tbsp olive oil 1/2 tsp ground cumin 1/2 tsp smoked paprika Salt to taste For Mushrooms 8 ounces mushrooms (such as cremini or button), sliced 1 Tbsp olive oil 2 cloves garlic, minced Salt and pepper to taste For Bowl Assembly 4 cups cups mixed lettuce leaves 1 cup cherry tomatoes (halved) Lemon wedges for serving 1 whole avocado, sliced (optional) Directions Preparing the Chicken Preheat your oven to 400°F (200°C). Rub the chicken breasts with olive oil, paprika, garlic powder, salt, and pepper Place the seasoned chicken on a baking sheet and bake for 20-25 minutes or until cooked through. Once done, set aside to cool before slicing. For Cooking the Quinoa Rinse the quinoa under cold water to remove any bitterness. In a medium-sized saucepan, combine the rinsed quinoa, water or vegetable broth, and salt. Bring the mixture to a boil over medium heat, then reduce the heat to low and cover. Simmer for 15-20 minutes or until the liquid is absorbed and the quinoa is tender. Fluff with a fork and set aside. Roasting the chickpeas Preheat your oven to 400°F (200°C). In a bowl, toss the drained and rinsed chickpeas with olive oil, cumin, smoked paprika, and salt Spread the seasoned chickpeas on a baking sheet and roast for 20-25 minutes or until crispy. Stir occasionally for even browning Sautéing the mushrooms: Heat olive oil in a skillet over medium heat. Add minced garlic and sliced mushrooms to the skillet. Sauté for 5-7 minutes or until the mushrooms are tender and golden brown Season with salt and pepper to taste. Assembling the Buddha bowl Divide the mixed lettuce leaves between two bowls as a base Arrange sliced chicken, cooked quinoa, roasted chickpeas, sautéed mushrooms, cherry tomatoes, and any additional vegetables you desire on top of the lettuce. Add any additional topping such as sliced avocado, cabbage or raw broccoli Drizzle your favorite dressing over the bowl or serve it on the side. Squeeze fresh lemon juice over the bowl for an extra burst of flavor. Toss the ingredients together just before eating to combine all the flavors. In conclusion, Chicken Buddha bowls are a versatile and nutritious meal option that combines the best of both taste and health. With a harmonious blend of tender chicken, fresh vegetables, and wholesome grains, these bowls offer a balanced array of nutrients essential for a healthy diet. Their customizable nature allows for endless creativity, making them suitable for various dietary preferences and lifestyles. Whether enjoyed as a quick lunch or a hearty dinner, Chicken Buddha bowls provide a satisfying, delicious, and nutrient-packed dining experience that can easily become a staple in anyone’s meal repertoire. Share: Facebook Pinterest Email Shop Now Social Media Facebook-f Youtube Pinterest Instagram Tiktok Most Popular Get The Latest Updates Subscribe To Our Weekly Newsletter No spam, notifications only about new post, updates. Categories On Key Related Posts
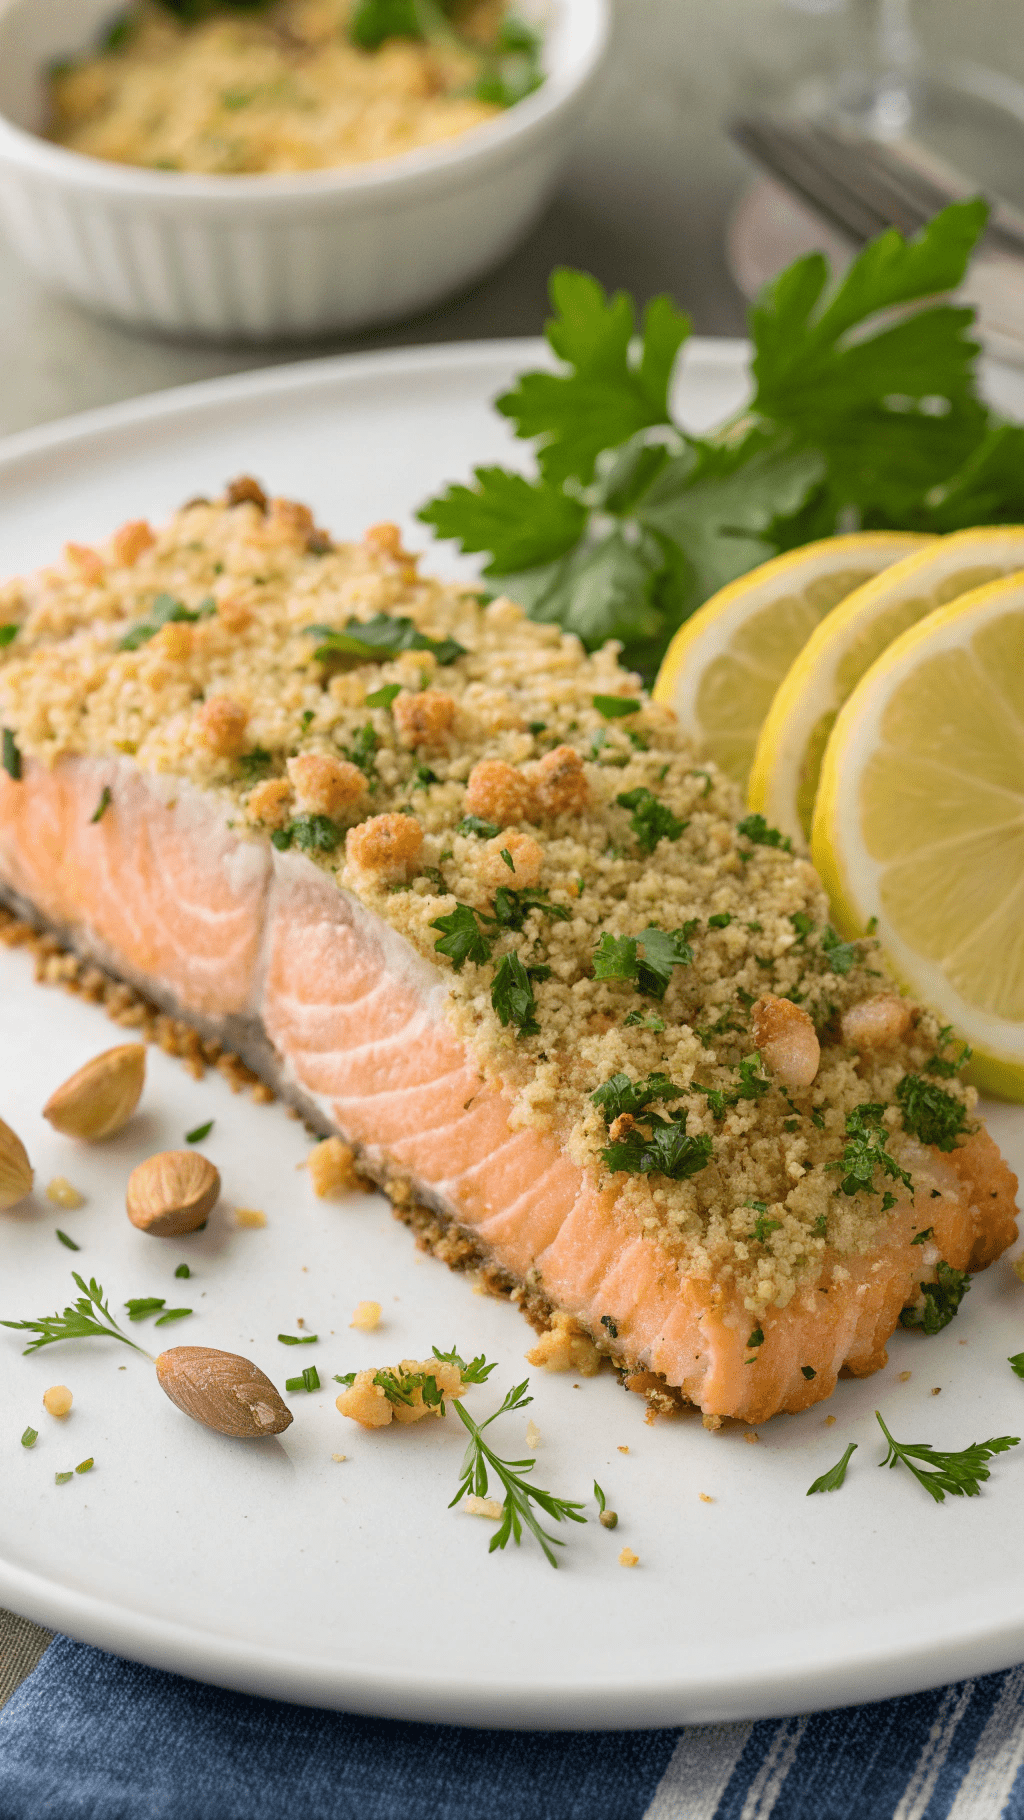
Macadamia Cilantro Crust Baked Salmon
Introduction:Salmon is a versatile and nutritious fish that is loved by seafood enthusiasts worldwide. When combined with a crunchy macadamia-cilantro crust, it takes on a whole new level of flavor and texture. In this blog post, we will guide you through the step-by-step process of preparing a mouthwatering baked salmon dish with a delightful macadamia-cilantro crust. Get ready to impress your family and friends with this delectable recipe! Ingredients:To make this delicious baked salmon with macadamia-cilantro crust, you will need the following ingredients: – 4 salmon fillets (6 ounces each)– 1 cup macadamia nuts, finely chopped– 1/2 cup fresh cilantro leaves, finely chopped– 1/4 cup panko breadcrumbs– 2 tablespoons Dijon mustard– 2 tablespoons honey– 1 tablespoon olive oil– Salt and pepper to taste Instructions: 1. Preheat the oven: Start by preheating your oven to 400°F (200°C). This will ensure that your salmon cooks evenly and develops a beautiful crust. 2. Prepare the macadamia-cilantro crust: In a mixing bowl, combine the finely chopped macadamia nuts, cilantro leaves, panko breadcrumbs, salt, and pepper. Mix well until all the ingredients are evenly distributed. 3. Season the salmon fillets: Place the salmon fillets on a baking sheet lined with parchment paper or aluminum foil. Season both sides of the fillets with salt and pepper according to your taste preferences. 4. Apply Dijon mustard and honey: In a small bowl, whisk together the Dijon mustard and honey until well combined. Brush this mixture evenly over the top of each salmon fillet. 5. Add the macadamia-cilantro crust: Take the macadamia-cilantro crust mixture and press it onto the top of each salmon fillet, ensuring an even coating. Gently pat down the crust to help it adhere to the salmon. 6. Drizzle with olive oil: Drizzle a tablespoon of olive oil over the top of each salmon fillet. This will help the crust turn golden brown and add a touch of richness to the dish. 7. Bake the salmon: Place the baking sheet with the salmon fillets in the preheated oven and bake for approximately 12-15 minutes, or until the salmon is cooked through and the crust is golden brown. 8. Serve and enjoy: Once baked, remove the salmon from the oven and let it rest for a few minutes. Serve your delicious baked salmon with macadamia-cilantro crust alongside your favorite side dishes, such as roasted vegetables or a fresh salad. Conclusion:Baked salmon with macadamia-cilantro crust is a delightful dish that combines the natural flavors of salmon with a crunchy and aromatic topping. The combination of macadamia nuts, cilantro, Dijon mustard, and honey creates a harmonious blend of textures and tastes that will leave you craving more. Whether you’re hosting a dinner party or simply looking to elevate your weeknight meal, this recipe is sure to impress. Give it a try and savor every bite!
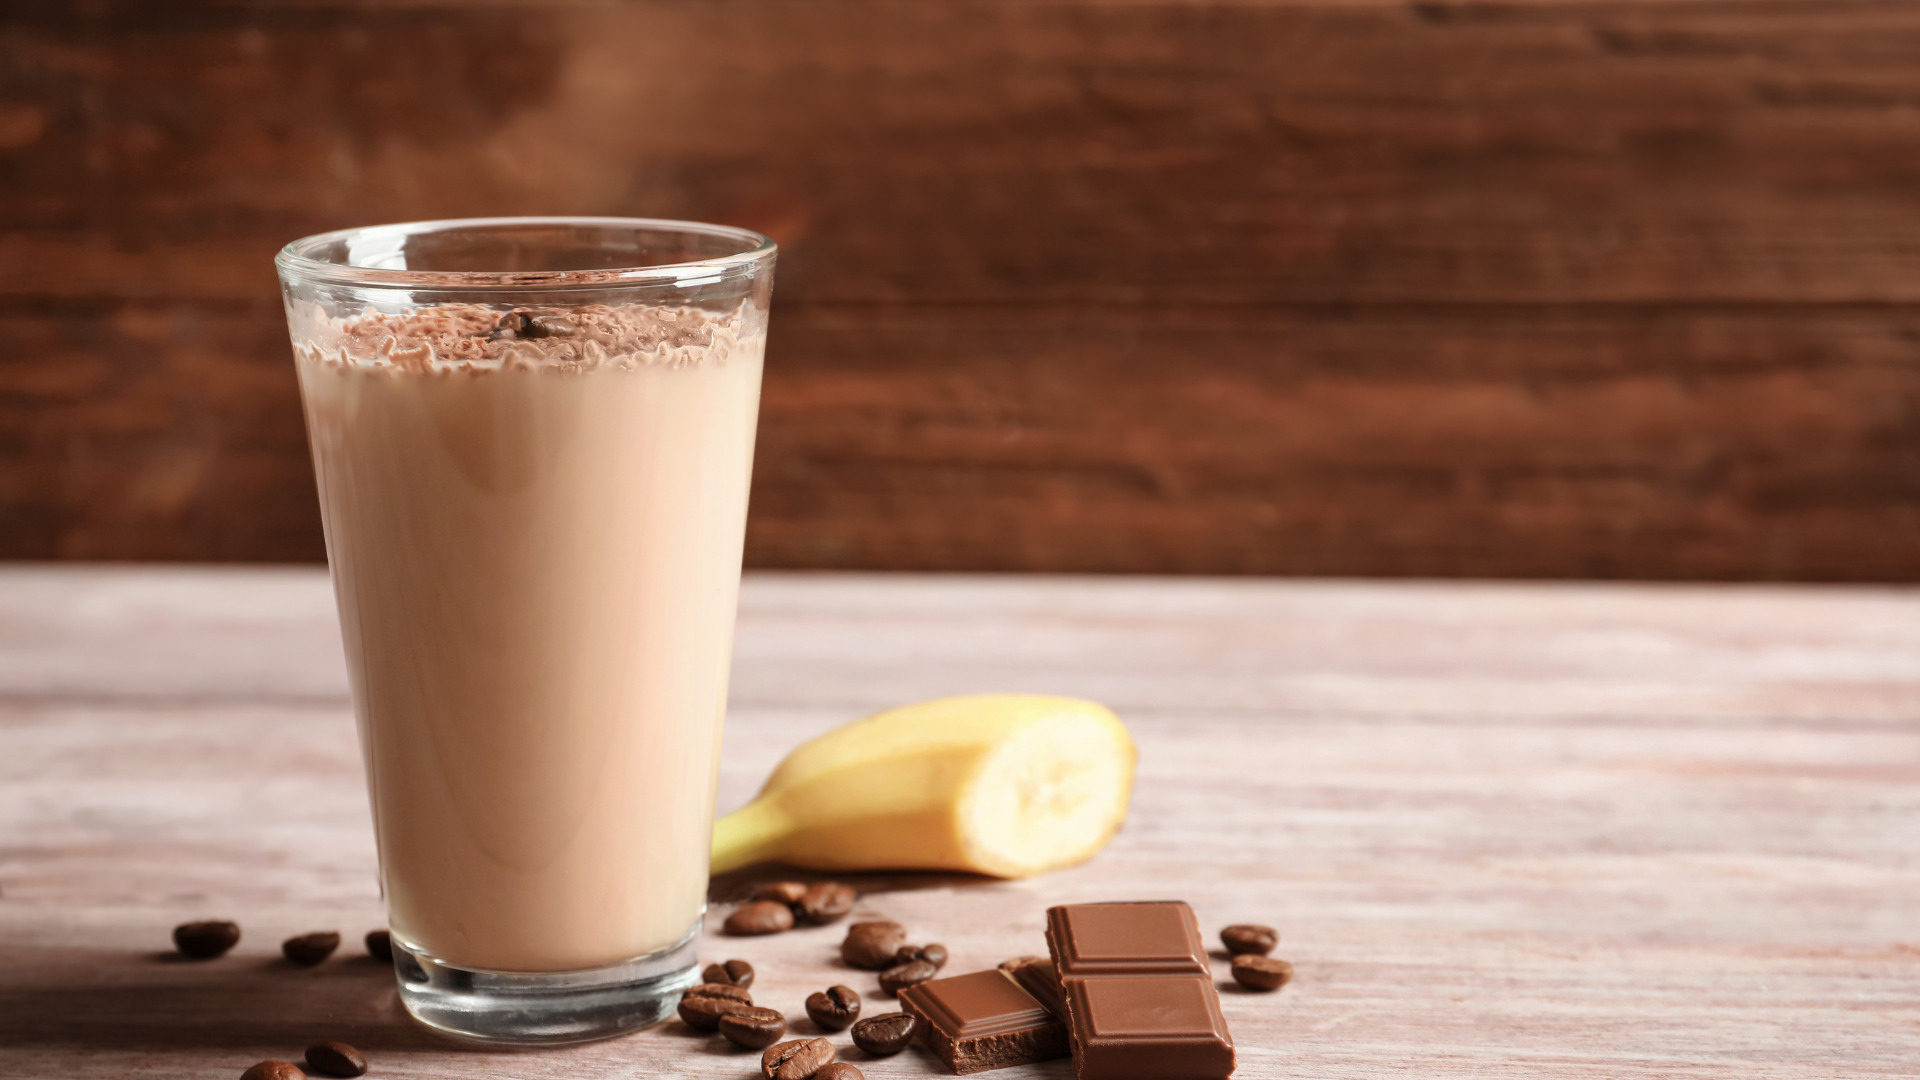
Vegan Chocolate Protein Shake
Are you looking for a delicious and healthy way to boost your protein intake? Look no further than a vegan chocolate protein shake! Packed with plant-based protein, essential nutrients, and the rich flavor of chocolate, this shake is not only satisfying but also nourishing. In this blog post, we will guide you through a simple and scrumptious recipe that will leave you energized and ready to take on the day. Ingredients: To create a vegan chocolate protein shake, you will need the following ingredients: – 1 ripe banana – 1 cup of unsweetened almond milk (or any plant-based milk of your choice) – 2 tablespoons of cocoa powder – 1 tablespoon of almond butter (or any nut butter) – 1 scoop of vegan chocolate protein powder – 1 teaspoon of maple syrup or agave nectar (optional, for added sweetness) – A handful of ice cubes Instructions: Now that we have gathered our ingredients, let’s dive into the step-by-step process of making this delectable vegan chocolate protein shake: Step 1: Gather all the ingredients and ensure they are readily available. Step 2: Peel the ripe banana and break it into smaller chunks for easier blending. Step 3: In a blender, combine the banana chunks, unsweetened almond milk, cocoa powder, almond butter, vegan chocolate protein powder, and sweetener (if desired). Step 4: Add a handful of ice cubes to the blender. The ice will help create a refreshing and creamy texture. Step 5: Blend all the ingredients together until smooth and creamy. If needed, scrape down the sides of the blender and blend again to ensure everything is well incorporated. Step 6: Once blended to your desired consistency, pour the vegan chocolate protein shake into a glass. Step 7: Optionally, you can garnish your shake with a sprinkle of cocoa powder or a few chocolate shavings for an extra touch of indulgence. Step 8: Serve immediately and enjoy the delightful flavors of your homemade vegan chocolate protein shake! Benefits of a Vegan Chocolate Protein Shake: This vegan chocolate protein shake offers numerous benefits, making it an excellent choice for those seeking a nutritious and satisfying beverage: 1. Plant-Based Protein: Vegan protein powders derived from sources like peas, brown rice, or hemp provide all the essential amino acids required by the body. They are easily digestible and suitable for individuals following a vegan or vegetarian lifestyle. 2. Nutrient-Rich: This shake is not only high in protein but also contains essential vitamins and minerals found in ingredients like bananas, almond milk, and cocoa powder. These nutrients contribute to overall health and well-being. 3. Satisfying and Energizing: The combination of protein, healthy fats from almond butter, and natural sugars from the banana provides a balanced source of energy that can keep you feeling full and satisfied throughout the day. Conclusion: Incorporating a vegan chocolate protein shake into your daily routine is an excellent way to boost your protein intake while enjoying a delicious treat. This recipe is simple to make, customizable to suit your taste preferences, and packed with essential nutrients. So why not indulge in this guilt-free pleasure and give your body the nourishment it deserves?
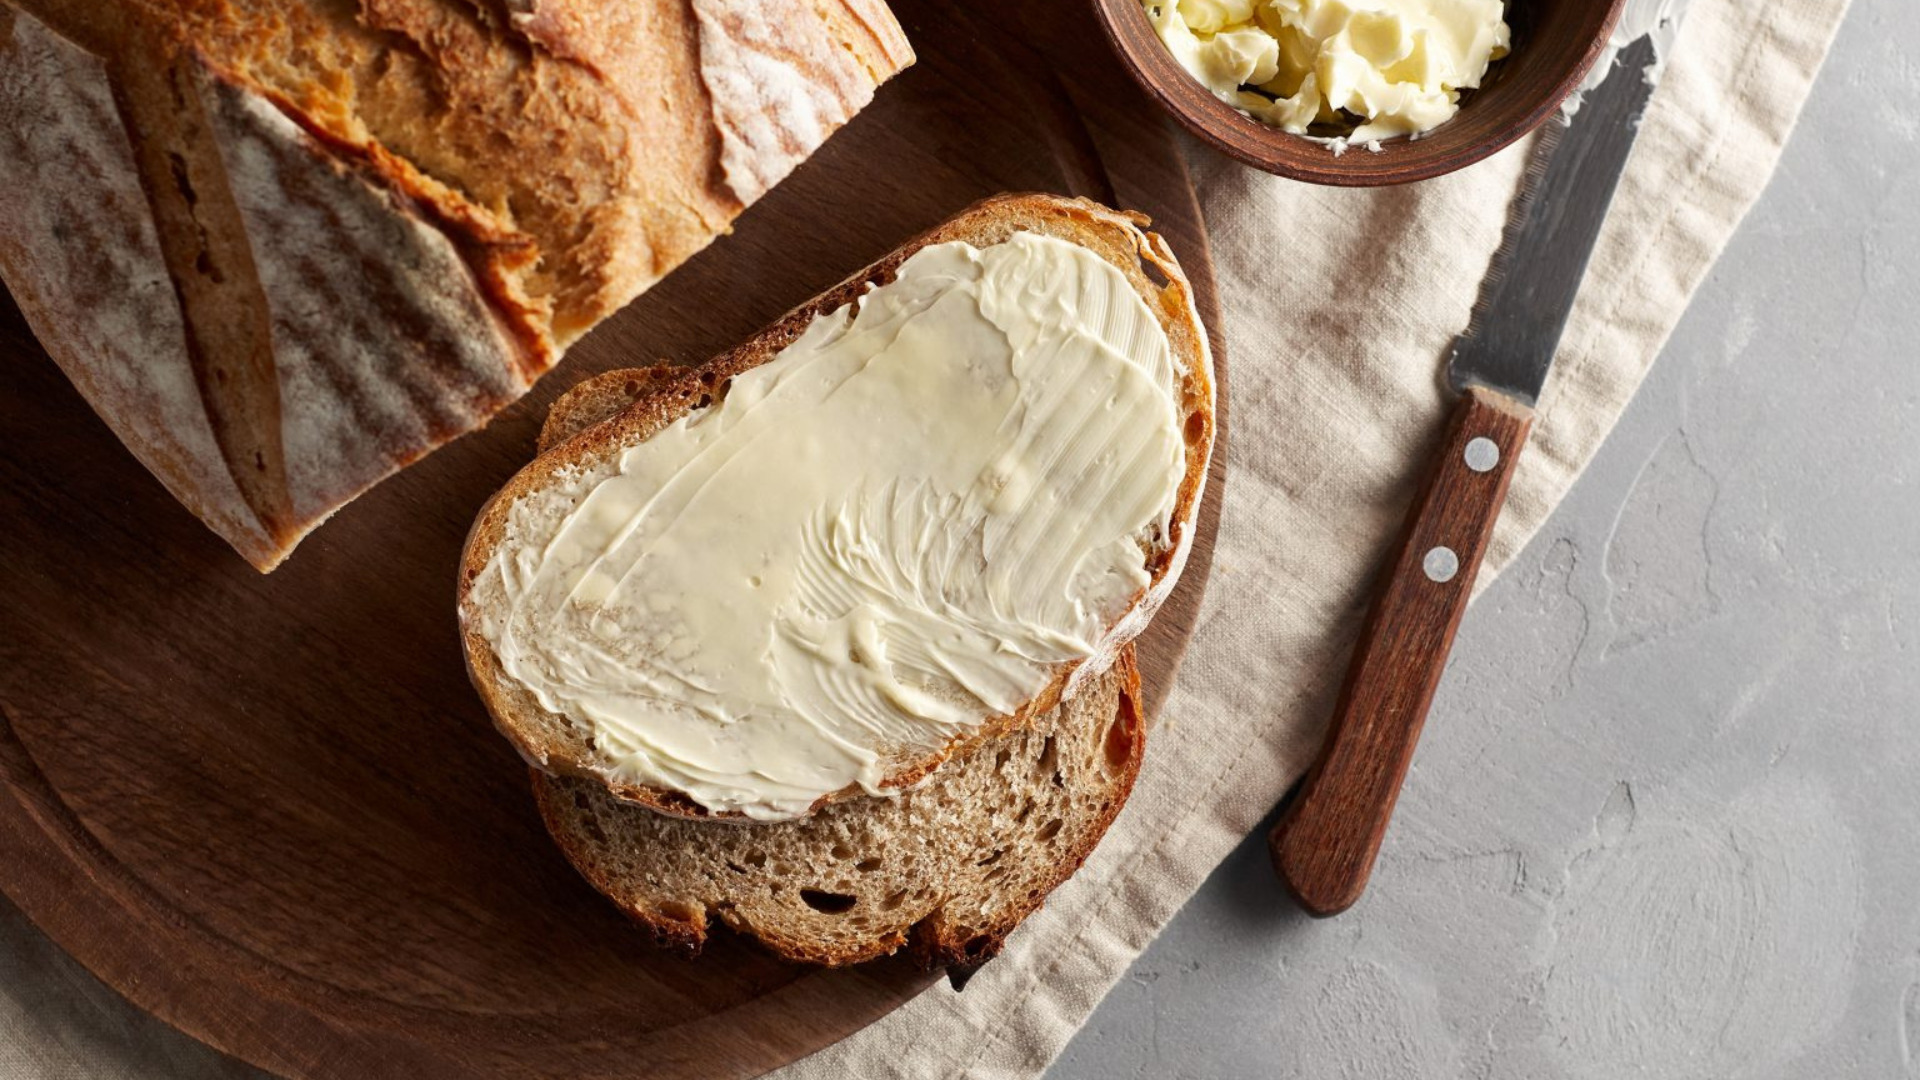
Homemade Vegan Butter Recipe
Homemade Vegan Butter Recipe As the popularity of veganism continues to rise, so does the demand for plant-based alternatives to traditional dairy products. One such staple in many kitchens is butter, which adds richness and flavor to a wide range of dishes. Fortunately, creating a vegan version of this beloved ingredient is easier than you might think. In this blog post, we will guide you through a simple yet delicious recipe for vegan butter that can be made at home. Homemade vegan butter is a versatile and delicious alternative to traditional dairy butter. It is a plant-based spread that mimics the creamy texture and rich flavor of butter, making it an excellent choice for those following a vegan or dairy-free diet. This homemade version allows you to have full control over the ingredients, ensuring a healthier and more sustainable option. Can I use any kind of non-dairy milk for this recipe? To make homemade vegan butter, you will need a few simple ingredients that are easily accessible. The base of this recipe typically consists of plant-based oils such as coconut oil, olive oil, or avocado oil. These oils provide the necessary fat content to achieve the desired texture and consistency. Additionally, non-dairy milk, such as almond milk or soy milk, is often used to add creaminess. How do I enhance the taste of homemade vegan butter? One common ingredient in homemade vegan butter is nutritional yeast. Nutritional yeast not only adds a subtle cheesy flavor but also provides essential nutrients like B vitamins. Other flavorings such as salt, apple cider vinegar, and lemon juice can be added to enhance the taste and mimic the tanginess of traditional butter. One of the advantages of homemade vegan butter is that it allows customization according to personal preferences. By experimenting with different oils and flavorings, individuals can create their own unique variations of vegan butter tailored to their taste buds. What can I use homemade vegan butter on? Homemade vegan butter can be used in various ways in cooking and baking. It can be spread on toast, used for sautéing vegetables, or incorporated into recipes that call for butter. It can also be used as a substitute for dairy butter in baking, providing moisture and richness to cakes, cookies, and pastries. In addition to being a suitable option for vegans and those with dairy allergies, homemade vegan butter also offers environmental benefits. The production of traditional dairy butter requires significant amounts of water, land, and resources. By opting for homemade vegan butter, individuals can contribute to reducing their carbon footprint and promoting sustainability. Feeling Lazy? You dont have to cook if you dont feel like it. Order Vegan Butter and have it shipped straight to your door step! Pin Print Vegan Butter Recipe Recipe by ccthefitnessblogDifficulty: EasyServings 24 servingsPrep time 5 minutesCooking timeminutesCalories 40 kcal Ingredients 1 cup refined coconut oil 1/2 cup unsweetened plant-based milk (such as almond or soy milk) 1/4 cup refined liquid coconut oil 1 teaspoon apple cider vinegar 1/2 teaspoon salt 1/4 teaspoon nutritional yeast (optional, for a slightly cheesy flavor) 1/4 teaspoon turmeric powder (optional, for a yellow color reminiscent of traditional butter) Directions Melt the coconut oil In a small saucepan, melt the refined coconut oil over low heat until it becomes completely liquid. Be careful not to overheat it. Combine the ingredients In a blender or food processor, combine the melted coconut oil, plant-based milk, liquid coconut oil, apple cider vinegar, salt, nutritional yeast (if using), and turmeric powder (if using). Blend on high speed until all the ingredients are well combined and the mixture is smooth and creamy. Chill and solidify Transfer the mixture into a container or mold of your choice. You can use an empty butter dish or silicone molds for individual portions. Place the container in the refrigerator and allow it to chill for at least two hours or until it solidifies. Store and use Once the vegan butter has solidified, it is ready to use. You can store it in the refrigerator for up to two weeks or freeze it for longer shelf life. Use it as a spread on bread, in baking recipes, or for sautéing and frying. Notes For Storing, You can store it in the refrigerator for up to two weeks or freeze it for longer shelf life. Use it as a spread on bread, in baking recipes, or for sautéing and frying. For Spreading, You can scoop out desired amount, sit out of fridge for a few minutes to soften up like regular butter. It is important to note that while homemade vegan butter can be a healthier alternative to dairy butter, it should still be consumed in moderation. Like any other high-fat food, excessive consumption may lead to weight gain and other health issues. It is always recommended to consult with a healthcare professional or registered dietitian for personalized dietary advice. In conclusion, homemade vegan butter is a versatile and customizable plant-based spread that provides a delicious alternative to traditional dairy butter. With its creamy texture and rich flavor, it can be used in various cooking and baking applications. By making your own vegan butter at home, you have control over the ingredients and can contribute to a more sustainable food system. In conclusion, homemade vegan butter is a versatile and customizable plant-based spread that provides a delicious alternative to traditional dairy butter. With its creamy texture and rich flavor, it can be used in various cooking and baking applications. By making your own vegan butter at home, you have control over the ingredients and can contribute to a more sustainable food system. Share: Facebook Pinterest Email Social Media Facebook-f Youtube Pinterest Instagram Tiktok Most Popular Get The Latest Updates Subscribe To Our Weekly Newsletter No spam, notifications only about new post, updates. Categories On Key Related Posts
Achieving Clear Skin: The Power of Nutritious Foods
Having clear and radiant skin is a goal for many individuals. While skincare routines and products play a significant role in maintaining healthy skin, the importance of nutrition should not be overlooked. The foods we consume can have a profound impact on our skin’s health and appearance. In this blog post, we will explore some of the best foods that promote clear skin and discuss their beneficial properties. 1. Fatty Fish: Fatty fish such as salmon, mackerel, and sardines are excellent sources of omega-3 fatty acids. These essential fats help to nourish the skin by reducing inflammation and keeping it moisturized. Omega-3 fatty acids also support the production of collagen, a protein that maintains the skin’s elasticity and firmness. Including fatty fish in your diet can help combat dryness, redness, and acne breakouts. 2. Avocados: Avocados are not only delicious but also packed with nutrients that benefit the skin. They are rich in healthy fats, particularly monounsaturated fats, which help to keep the skin hydrated and supple. Additionally, avocados contain vitamin E, an antioxidant that protects the skin from oxidative damage caused by free radicals. This nutrient also aids in reducing inflammation and promoting overall skin health. 3. Berries: Berries such as strawberries, blueberries, and raspberries are loaded with antioxidants that contribute to clear and youthful-looking skin. Antioxidants help to neutralize free radicals, which can damage cells and accelerate aging processes. Berries are also high in vitamins A and C, which play crucial roles in collagen production and maintaining skin elasticity. Including a variety of berries in your diet can provide your skin with a natural glow while protecting it from environmental stressors. 4. Green Tea: Green tea is renowned for its numerous health benefits, including its positive effects on the skin. It contains antioxidants called catechins, which have anti-inflammatory and anti-aging properties. These compounds help to reduce redness, fight acne-causing bacteria, and improve overall skin complexion. Drinking green tea regularly can also help protect the skin from sun damage and promote a more even skin tone. 5. Nuts and Seeds: Nuts and seeds, such as almonds, walnuts, flaxseeds, and chia seeds, are excellent sources of essential fatty acids, vitamins, and minerals that support clear skin. They provide a range of nutrients like vitamin E, zinc, selenium, and omega-3 fatty acids that help maintain healthy skin cells and prevent inflammation. Including a handful of nuts or seeds in your daily diet can contribute to a smoother and more radiant complexion. 6. Leafy Greens: Leafy greens like spinach, kale, and Swiss chard are packed with vitamins A, C, and K, as well as various antioxidants that promote clear skin. These vegetables help to detoxify the body by eliminating toxins that can lead to breakouts and dullness. The high vitamin content in leafy greens aids in collagen production and protects against sun damage. Adding these nutrient-dense greens to your meals can enhance your skin’s health and appearance. Conclusion: While skincare products are undoubtedly important for maintaining clear skin, incorporating a balanced diet rich in nutritious foods can significantly enhance your skin’s health from within. Fatty fish, avocados, berries, green tea, nuts and seeds, as well as leafy greens are just a few examples of foods that promote clear skin. By nourishing your body with these beneficial ingredients, you can achieve a radiant complexion that reflects your overall well-being.
Foods Most People Didn’t Know Were Gluten Free
Foods Most People Didn’t Know Were Gluten Free Gluten-free diets have gained significant popularity in recent years, whether due to medical necessity or personal preference. While many people associate gluten with wheat-based products, there is a wide range of foods that are naturally gluten-free or can be easily modified to fit a gluten-free lifestyle. In this blog post, we will delve into some lesser-known foods that most people didn’t realize were gluten-free. 1. QUINOA Quinoa is a versatile and nutritious grain-like seed that has been consumed for thousands of years. It is naturally gluten-free and packed with essential nutrients such as protein, fiber, and various vitamins and minerals. Quinoa can be used as a substitute for rice or couscous in various dishes, including salads, stir-fries, and even desserts. 2. BUCKWHEAT Despite its name, buckwheat is not related to wheat at all. It is actually a fruit seed that is commonly used as a grain substitute due to its nutty flavor and nutritional benefits. Buckwheat is rich in fiber, protein, and antioxidants. It can be ground into flour to make pancakes, noodles, or used as a base for gluten-free bread. 3. TAMARI Tamari is a type of soy sauce that is traditionally made without wheat. Unlike regular soy sauce, which often contains wheat as an ingredient, tamari is made solely from fermented soybeans. It adds depth of flavor to various dishes and can be used as a dipping sauce or marinade. However, it’s important to check the label when purchasing tamari as some brands may add wheat as a filler. 4. MILLET Millet is a small grain that has been cultivated for thousands of years and is widely consumed in many parts of the world. It is naturally gluten-free and provides an excellent source of fiber, protein, and essential minerals. Millet can be cooked and used as a side dish, added to soups or stews, or ground into flour for baking gluten-free goods. 5. COCONUT Coconut is a versatile ingredient that can be used in various forms, including coconut milk, coconut flour, and coconut oil. All of these coconut-based products are naturally gluten-free and can be incorporated into a wide range of recipes. Coconut flour is an excellent alternative to wheat flour in baking, while coconut milk adds richness to curries and desserts. 6. LENTILS Lentils are legumes that come in various colors and sizes, including green, red, brown, and black. They are highly nutritious, packed with protein, fiber, and essential minerals. Lentils can be cooked and used as a base for soups, stews, salads, or even veggie burgers. They are a great gluten-free alternative to grains like wheat or barley. 7. CHIA SEEDS Chia seeds have gained popularity in recent years due to their nutritional benefits. These tiny seeds are rich in omega-3 fatty acids, fiber, and antioxidants. They can be used as a thickening agent in recipes or soaked in liquid to create a gel-like consistency. Chia seeds are often used in gluten-free baking as an egg substitute. While the gluten-free diet may seem restrictive at first glance, there is a wide variety of foods that are naturally gluten-free or can be easily modified to fit this dietary lifestyle. From quinoa and buckwheat to tamari and lentils, these lesser-known options provide delicious alternatives for those following a gluten-free diet. Share: Facebook Pinterest Email Social Media Facebook-f Youtube Pinterest Instagram Tiktok Most Popular Get The Latest Updates Subscribe To Our Weekly Newsletter No spam, notifications only about new post, updates. Categories On Key Related Posts
How to Heal A Leaky Gut
How to Heal A Leaky Gut Leaky gut syndrome, also known as increased intestinal permeability, is a condition that affects the lining of the intestines. It occurs when the tight junctions between the cells in the intestinal wall become compromised, allowing harmful substances such as toxins, bacteria, and undigested food particles to leak into the bloodstream. This can lead to a range of health issues, including digestive problems, food sensitivities, autoimmune disorders, and inflammation. In this blog post, we will explore various strategies and lifestyle changes that can help heal a leaky gut and restore optimal gut health. 1. Identify and Remove Trigger Foods The first step in healing a leaky gut is to identify and eliminate any trigger foods that may be contributing to the condition. Common culprits include gluten, dairy products, processed foods, refined sugars, alcohol, and caffeine. These foods can irritate the intestinal lining and exacerbate inflammation. By removing these trigger foods from your diet, you give your gut a chance to heal and reduce further damage. 2. Adopt an Anti-Inflammatory Diet Following an anti-inflammatory diet is crucial for healing a leaky gut. This involves consuming nutrient-dense whole foods that are rich in antioxidants and anti-inflammatory compounds. Focus on incorporating plenty of fruits, vegetables, lean proteins, healthy fats (such as avocados and olive oil), nuts, seeds, and fermented foods into your meals. These foods provide essential nutrients while reducing inflammation in the gut. 3. Restore Gut Microbiome Balance A healthy gut microbiome plays a vital role in maintaining gut health. To restore balance in your gut microbiome, consider incorporating probiotic-rich foods into your diet or taking high-quality probiotic supplements. Probiotics are beneficial bacteria that help promote a healthy balance of microorganisms in the gut. Additionally, consuming prebiotic-rich foods such as garlic, onions, asparagus, and bananas can provide nourishment for the beneficial bacteria in your gut. 4. Support Digestive Enzymes: Digestive enzymes are essential for breaking down food and aiding in nutrient absorption. Supplementing with digestive enzymes can help support the digestive process and reduce the strain on the gut. Look for a high-quality enzyme supplement that contains a blend of proteases, lipases, and amylases to ensure optimal digestion. 5. Manage Stress Levels Chronic stress can have a detrimental impact on gut health. When we are stressed, our bodies release stress hormones that can disrupt the delicate balance of the gut microbiome and increase intestinal permeability. Incorporating stress management techniques such as meditation, deep breathing exercises, yoga, or regular physical activity can help reduce stress levels and support gut healing. 6. Repair Intestinal Lining Certain supplements and nutrients can aid in repairing the damaged intestinal lining. L-glutamine, an amino acid, is known for its ability to support gut health by promoting cell regeneration in the intestinal lining. Other beneficial supplements include zinc, omega-3 fatty acids, collagen peptides, and quercetin. However, it is important to consult with a healthcare professional before starting any new supplements. 7. Avoid NSAIDs and Antibiotics Nonsteroidal anti-inflammatory drugs (NSAIDs) and antibiotics can disrupt the delicate balance of the gut microbiome and contribute to leaky gut syndrome. Whenever possible, try to find natural alternatives for pain relief and limit antibiotic use to only when necessary. Healing a leaky gut requires a multifaceted approach that involves identifying trigger foods, adopting an anti-inflammatory diet, restoring gut microbiome balance, supporting digestive enzymes, managing stress levels, repairing the intestinal lining, and avoiding certain medications. By implementing these strategies and making lifestyle changes, you can support your body’s natural healing processes and restore optimal gut health. Share: Facebook Pinterest Email Social Media Facebook-f Youtube Pinterest Instagram Tiktok Most Popular Get The Latest Updates Subscribe To Our Weekly Newsletter No spam, notifications only about new post, updates. Categories On Key Related Posts
Lose Weight Without Going to The Gym
Lose Weight Without Going to The Gym Losing weight can be a challenging journey, but it doesn’t have to involve extreme diets or deprivation. By adopting a clean eating approach and maintaining a calorie deficit, you can achieve sustainable weight loss while nourishing your body with wholesome foods. In this blog post, we will delve into the principles of clean eating, explain the concept of a calorie deficit, and provide practical tips to help you reach your weight loss goals. Understanding Clean Eating Clean eating is a dietary approach that focuses on consuming whole, unprocessed foods while avoiding or minimizing processed and refined products. The goal is to nourish your body with nutrient-dense foods that provide essential vitamins, minerals, and antioxidants. By eliminating or reducing highly processed foods that are often high in added sugars, unhealthy fats, and artificial ingredients, you can optimize your health and support weight loss. Creating a Calorie Deficit To lose weight, you need to create a calorie deficit, which means consuming fewer calories than your body burns. This forces your body to tap into its fat stores for energy, resulting in weight loss over time. It’s important to note that creating too large of a calorie deficit can be counterproductive and may lead to muscle loss or a slowed metabolism. Therefore, it’s crucial to strike a balance by gradually reducing your calorie intake while ensuring adequate nutrition. Practical Tips for Clean Eating and Calorie Deficit 1. Choose Whole Foods: Base your meals around whole foods such as fruits, vegetables, lean proteins, whole grains, and healthy fats. These foods are naturally low in calories and high in nutrients, making them ideal for weight loss. 2. Portion Control: Pay attention to portion sizes to avoid overeating. Use smaller plates and bowls to visually trick yourself into thinking you’re consuming more food than you actually are. Additionally, practice mindful eating by savoring each bite and listening to your body’s hunger and fullness cues. 3. Track Your Calories: Keeping track of your calorie intake can be a helpful tool in creating a calorie deficit. Numerous mobile apps and websites allow you to log your meals and track your daily calorie consumption. This awareness can help you make informed choices and adjust your portion sizes accordingly. 4. Meal Planning: Plan your meals in advance to ensure you have nutritious options readily available. This can help prevent impulsive food choices and reduce the likelihood of reaching for unhealthy snacks. Include a balance of macronutrients (carbohydrates, proteins, and fats) in each meal to promote satiety and provide sustained energy throughout the day. 5. Stay Hydrated: Drinking an adequate amount of water is essential for overall health and weight loss. Water helps regulate metabolism, aids digestion, and can help curb appetite. Aim to drink at least eight glasses of water per day, or more if you are physically active. 6. Limit Added Sugars and Processed Foods: Minimize your consumption of sugary beverages, desserts, processed snacks, and foods high in added sugars. These items are often calorie-dense but nutrient-poor, making it difficult to maintain a calorie deficit while meeting your nutritional needs. 7. Regular Physical Activity: Now–you don’t have to go to the gym but if Incorporate regular exercise it can enhance your results and even speed it up. Instead of going to the gym you can workout at home by doing strength training, which can help boost metabolism, preserve muscle mass, and improve overall fitness. Or Even outside by engaging in both cardiovascular exercises (such as brisk walking, jogging, or cycling). Losing weight through clean eating and maintaining a calorie deficit is a sustainable approach that promotes overall health while shedding excess pounds. By prioritizing whole foods, portion control, tracking calories, meal planning, staying hydrated, limiting processed foods, and engaging in regular physical activity, you can achieve your weight loss goals effectively Share: Facebook Pinterest Email Social Media Facebook-f Youtube Pinterest Instagram Tiktok Most Popular Get The Latest Updates Subscribe To Our Weekly Newsletter No spam, notifications only about new post, updates. Categories On Key Related Posts
The Best Way to Workout: Guide to Full Body Workouts
Introduction:In today’s fast-paced world, finding time for exercise can be a challenge. However, incorporating a full body workout into your fitness routine can provide numerous benefits. A full body workout targets all major muscle groups, helping you build strength, improve cardiovascular health, and enhance overall fitness. In this blog post, we will delve into the concept of full body workouts, their benefits, and provide a comprehensive guide to help you design an effective routine. What is a Full Body Workout?A full body workout is a training method that engages multiple muscle groups in a single session. Unlike split routines that focus on specific muscle groups on different days, full body workouts aim to work the entire body in one session. This approach allows for efficient use of time and ensures balanced development of all muscle groups. Benefits of Full Body Workouts:1. Time Efficiency: One of the primary advantages of full body workouts is their time efficiency. By targeting multiple muscle groups simultaneously, you can complete a comprehensive workout in less time compared to split routines. 2. Increased Caloric Burn: Full body workouts engage large muscle groups, leading to higher energy expenditure during and after the workout. This increased caloric burn can aid in weight loss or maintenance goals. 3. Improved Muscle Balance: By working all major muscle groups evenly, full body workouts promote balanced muscular development. This helps prevent muscular imbalances that can lead to injuries or postural issues. 4. Enhanced Cardiovascular Fitness: Many full body exercises involve compound movements that elevate heart rate and improve cardiovascular endurance. This dual benefit of strength and cardio training makes full body workouts an excellent choice for overall fitness improvement. Designing an Effective Full Body Workout Routine:When designing a full body workout routine, it is essential to consider various factors such as your fitness level, goals, available equipment, and time constraints. Here are some key components to include: 1. Warm-up: Begin each session with a dynamic warm-up to prepare your muscles and joints for the upcoming workout. Incorporate movements that mimic the exercises you will perform, gradually increasing intensity. 2. Compound Exercises: Focus on compound exercises that engage multiple muscle groups simultaneously. Examples include squats, deadlifts, lunges, push-ups, pull-ups, and overhead presses. These exercises provide maximum efficiency and stimulate overall muscle growth. 3. Resistance Training: Incorporate both bodyweight exercises and resistance training using free weights or machines. Gradually increase the resistance as your strength improves to continue challenging your muscles. 4. Cardiovascular Exercise: Include cardiovascular activities such as running, cycling, or rowing to elevate heart rate and improve endurance. Integrate these exercises between strength sets or dedicate a separate day for cardio training. 5. Core Strengthening: Don’t forget to include exercises that target your core muscles, such as planks, Russian twists, or bicycle crunches. A strong core is essential for stability and overall functional fitness. 6. Flexibility and Mobility: Allocate time for stretching exercises or yoga poses to improve flexibility and maintain joint mobility. This can help prevent injuries and enhance overall performance. 7. Rest and Recovery: Allow adequate rest between workouts to promote muscle recovery and prevent overtraining. Aim for at least one or two days of rest per week. Conclusion:Incorporating a full body workout routine into your fitness regimen can provide numerous benefits, including time efficiency, increased caloric burn, improved muscle balance, and enhanced cardiovascular fitness. By following the guidelines mentioned above and customizing them to suit your individual needs, you can design an effective full body workout routine that helps you achieve total fitness.

